Saturday, October 27, 2007

Emacs is the text editor with everything

Getting Started with Emacs

Emacs is the text editor with everything. Learn the basics—maybe you'll even want to keep your calendar on it.

This article is a whirlwind introduction to Emacs that assumes you have Emacs installed and running (easy enough on most Linux distributions). It also assumes that you have used Emacs' built-in tutorial. Program development in Emacs is not the topic, as that was covered in my June 2002 LJ article “Emacs: the Free Software IDE” [available at www.linuxjournal.com/article/5765].

To launch Emacs from an xterm, enter emacs &. The ampersand puts Emacs into the background. As X provides the display for Emacs, this setup is fine.

You also can run Emacs in a console by entering emacs without the ampersand. To run Emacs in an xterm without opening a new window, launch it with emacs -nw. These console and xterm modes are great for situations where you don't have X, such as an SSH connection to a remote server. But if you have SSH set up to forward X, you can run Emacs (and other X applications) remotely.

If you haven't taken the Emacs tutorial, now is the time to do it. Pressing Ctrl-H then T gets you to it. The tutorial is ancient as computers go (1985), so it ignores cursor keys and other modern conveniences. Emacs supports these features but the tutorial doesn't take them into account. It's a good idea to be aware of, if not learn, some of the Emacs keystrokes, though. You can set bash and many other GNU programs to use them. So, for example, Ctrl-B and Ctrl-N can do exactly the same things in Emacs as they do in bash. In fact, Emacs-style key bindings are the default in bash.

The tutorial should teach you basic cursor movement, how to abort an Emacs command, Emacs windowing, the relationship between buffers and files and so on. Probably the most important thing to remember from the tutorial is the movement keys are usually a given key (F for forward) with different modifiers for different ranges. For example, Ctrl-F moves one character forward, and M-F moves a word forward (M- is Emacs notation for Meta, which on most keyboards means the Alt key).

Emacs existed long before web browsers, so it uses the term frame for what X calls a window, and window for a section within a frame. As this is an Emacs article, this article uses Emacs terminology. To display a new window with a horizontal split, use Ctrl-X 2. For a new window with a vertical split, use Ctrl-X 3. Whereas Ctrl-X 5 1 gives you a whole new frame to play in, Ctrl-X 0 and Ctrl-X 5 0 kill off the current window and frame, respectively.

Another highlight of the tutorial is an introduction to Emacs' incremental search commands. They make life much easier, so learn and remember them.

Ctrl-H is the gateway to Emacs' help system. Pressing Ctrl-H ? gives you a menu for different parts of the help system. The Info system (Ctrl-H I) gives you access to FSF documentation in FSF's Info format. A form of hypertext that predates the World Wide Web, it is arranged in a tree structure. You also can go to an Info node for an Emacs function with Ctrl-H Ctrl-F. This section provides information on the current major and minor modes (more on those in a moment), the warranty and license under which Emacs is provided and other information. Because Emacs' help system is displayed by Emacs, the cursor movement keystrokes you learned in the tutorial apply to the help system.

Getting in the Mode

According to the top Emacs info page, Emacs is the extensible, customizable, self-documenting, real-time display editor. It is extensible because it is written in Emacs Lisp, or elisp, a dialect of Lisp especially customized for Emacs and text processing. You therefore can extend Emacs by writing code in elisp. Furthermore, you can customize it by changing the values of existing elisp variables. Self-documenting might be a slight exaggeration, but elisp does encourage programmers to document. And as we've seen, there is extensive help available.

Users also can customize Emacs by adapting it to specific applications. Do this by switching to what is called a major mode. Only one major mode can be active in a buffer at a time, but you can switch major modes on the fly. For example, when writing CGI scripts it is useful to toggle between Perl mode and HTML Helper mode.

To identify the current modes active in a buffer, see the mode line. In parentheses you will find one or more modes, with the current major mode listed first. Not all minor modes identify themselves in the mode parentheses, but their action is obvious, such as Column Number mode.

Major Modes

Major modes are generally associated with file extensions. A Lisp variable, auto-mode-alist, does this association, and we'll show you how to add to it. Emacs also recognizes associations with shebang entries in the first line of scripts, like this one for Perl:

#! /usr/bin/perl

And you can always force the mode in the first line of a document by surrounding it with -*-, like this:

# -*- shell-script -*-
To switch manually from one major mode to another, use M-X mode-name. For example, M-X perl-mode puts Emacs into the major mode for editing Perl.

Major modes provide a number of useful facilities. They usually provide custom indentation and pretty printing options suitable to the subject at hand. There is often some way to insert a comment with a short key sequence. A region of text can be commented out with M-X comment-region. One advantage of using Emacs for all your editing is the functions (and their keystrokes and menu entries) available in one major mode tend to be available in another, so if you know how to edit C in Emacs, you probably can edit SQL in Emacs as well (Figure 1).

Figure 1. C mode in Emacs, showing font locking (color syntax highlighting). The indenting is courtesy of C mode.

Major modes typically provide what Emacs calls font locking, a feature everyone else calls syntax coloring. It automatically associates syntax with colors. For example, comments show up in red, data types in green and strings in a light red. Another advantage of editing with Emacs is that color associations operate across modes, so comments are red regardless of whether you are working in assembler or XML.

Major modes redefine how keystrokes operate, usually the Tab and Delete keys. Also, major modes have mode-specific commands accessed with the prefix Ctrl-C. For example, to validate an SGML document in PSGML mode, use Ctrl-C Ctrl-V.

One of the most powerful major modes around is Lennart Staflin's PSGML mode (see Resources). It facilitates inserting SGML or XML tags and provides automatic pretty printing comparable to C mode. PSGML mode has font locking and other goodies, but it also reads the DTD and uses it to enforce proper tag nesting. For example, in DocBook, it won't let you insert a directly into a . It also is a front end for a validator (Figure 2).

Figure 2. Editing a Linux Documentation Project document in the DocBook SGML DTD in Emacs. The font locking highlights tags and entities for you.

Other major modes that almost anyone will find useful are Dired mode, Ediff mode, W3 and the calendar and diary. Dired mode is for editing directories. You can navigate from directory to directory, visit files and edit file metadata, such as permissions and ownership. One of the more powerful features of Dired mode is the ability to grep a number of files and have Dired mark the hits. You can then visit each hit in sequence and edit it. This allows you to manipulate files en masse, including renaming them or deleting them.

One mode that has proven to be quite useful is the calendar/diary. Not just any calendar tool, Calendar mode allows you to do date manipulations in and conversions between Gregorian and Julian, Copt, Hebrew and Islamic calendars. And, for something completely different, date your next intra-office memo in the Persian or Mayan calendar. Or, send your next bug report to the Free Software Foundation in the French Revolutionary Calendar (Figure 3).

Figure 3. Emacs' Calendar and Diary

Somewhat more useful than obscure calendars is the diary. With the diary, you can set appointments, anniversary reminders, cyclical events (such as “every third Thursday of the month”) and other types of events. If you specify the event time, Emacs will remind you as the time approaches. Not only is this diary system useful, but it runs in Emacs, so it runs on any computer on which Emacs runs—and that's most of them. The diary file is portable as well.

Ediff mode is useful for selectively applying patches. You also can use it to update files on several computers, such as my .emacs and diary files. Because it is selective, ediff lets you propagate changes in both directions. This can be important if you set appointments on your laptop and your secretary sets them on your desktop (Figures 4 and 5).

Figure 4. Diffing two files. Emacs shows not only which lines are changed, but what the changes are.

Figure 5. The control window for Ediff mode.

If browsing the World Wide Web is your thing, take a close look at William M. Perry's W3 mode. It is a web browser written in Emacs Lisp.

Minor Modes

Add-ons, called minor modes, supplement major modes. Most minor modes operate regardless of the major mode, so they can operate in different documents. For example, Show Paren mode matches parentheses for you. It is useful for the C programmer even in Text mode, and it's a godsend to the Lisp programmer.

Minor modes can be turned on and off as you wish. For example, when programming, Auto Fill mode (for filling, or line wrapping, paragraphs) is useful in comments, but a nuisance outside of them.

Some minor modes are global; they extend across all buffers when they are active. Others are local to a buffer. To activate a given mode, append -mode to its name and execute that command. So to activate Parentheses mode, press M-X then type show-paren-mode. To deactivate it, run the command again.

Several useful buffer-local minor modes are Abbrev mode (autocorrection on the fly), Auto Save mode, Font-Lock mode (color highlighting), Flyspell mode (spell checking on the fly) and Overwrite mode. Two useful minor modes that apply to all buffers are Line Number mode and Column Number mode. These print the current position of point in the mode line, usually over to the right.

Another useful mode is Ispell, which lets you spell check your buffer. It has special submodes for checking e-mail messages, programming language comments and strings, and other special uses.

Your .emacs File

Key to customizing Emacs is the initialization file, ~/.emacs. Administrators usually provide a global init file. If you don't like it you can tell Emacs to ignore it in your own init file. And, you can start Emacs with no init file with emacs -q, useful for debugging. The init file is nothing but some elisp used to set up Emacs the way you (or your administrator) like it (Figure 6).

Figure 6. Editing the author's .emacs, an example of Emacs Lisp, in Emacs.

You also can set variables in the init file. I customize HTML Helper mode by setting some mode variables:

(setq html-helper-do-write-file-hooks t)
(setq html-helper-build-new-buffer t)
(setq html-helper-address-string "Charles
Curley
")

Short useful functions, or macros, also go into .emacs. For example, the following function inserts today's date at point:

(defun insert-date ()
"Insert the current date according to the variable
\"insert-date-format\"."
(interactive "*")
(insert (format-time-string insert-date-format
(current-time))))
Keystrokes and key sequences also can be bound to functions. This allows you to use the key sequence to activate the function. For example, having written the function insert-date, I can bind it to the F3 function key with this line:
(global-set-key [f3] 'insert-date)
You also can use this capability to remap your keyboard. If you don't like some of the long key sequences in Emacs, you can rebind them.

The other way to customize Emacs is with the Customize menu, accessed with M-X customize or from the Options pull-down menu. This extensive menu system allows users to change variables and store the changes in your init file.

Emacs as a Server

A number of programs, such as crontab and mutt, invoke an external program as their editor. To let them run Emacs, set Emacs up to run as a server by putting this line into your .emacs file:

(server-start)

Next, set the environment variable EDITOR or VISUAL to emacsclient. In Bash, add this to your /etc/bashrc or your ~/x.bash_profile:

export VISUAL=emacsclient
Now, when you execute crontab -e or edit a message in mutt, you edit in your existing Emacs session instead of waiting for a new Emacs to start up. To finish editing and make emacslient exit, end your session in that buffer with Ctrl-C # instead of Ctrl-X K.

For emacsclient to work, Emacs must be running when the external program invokes it. This is consistent with the preferred way of using Emacs, which is to start Emacs when you log in and leave it running until you log out. One result of using emacsclient is you only have one instance of Emacs running at any one time. While memory is cheap today, it wasn't always so. And even today, if you want to run Linux on your laptop or elderly computers, conserving memory is always a good idea.

You might want to have Emacs edit your mail in Mail mode. If you use mutt, add this to your .emacs file:

;; Automatically go into mail-mode if
filename starts with /tmp/mutt
(setq auto-mode-alist (append (list (cons
"^\/tmp\/mutt" 'mail-mode))
auto-mode-alist))

Of course, to comply with the RFCs on netiquette, you will want Auto Fill mode active when you edit mail. Most major modes have a hook they execute on entering the mode and another they execute on leaving. Here is how to get Mail mode to invoke Auto Fill mode:

(defun my-mail-mode-hook ()
(auto-fill-mode 1)
)
(add-hook 'mail-mode-hook 'my-mail-mode-hook)
When you are done writing your e-mail, if you want to annoy the NSA, use Spook. To protest the Communications Decency Act (a decent thing to do) and annoy a lot of American politicians, see Bruce.

Finally, before we take our leave of this wild and woolly editor, let me bring the etc directory (in the Emacs directory tree) to your attention. It contains a number of useful documents, such as an Emacs English language reference card, in source (refcard.tex) and postscript (refcard.ps) form. Translations of the reference card into other languages are available. There is also some background material on Emacs and the GNU Project and a copy of the GPL.

Something you rarely find in proprietary software (at least, not deliberately) is present in Emacs: humor. Check out the bug report from the year 2199, the word list for Spook mode, some explanations of what Emacs stands for and more. And if you really want to exercise your font server, visit the file “HELLO”.

Newbie: Howto Improve Your Productivity With Emacs

10 Specific Ways to Improve Your Productivity With Emacs

Emacs is the world's best text editor. It's not just the best for editing program source; it's the best for any kind of text-editing. Mastering Emacs will make you more effective at writing and editing email, documentation drafts, blogs, HTML pages, XML files, and virtually everything else that requires any typing.

The tips in this little document are geared towards Emacs power-users. You should be familiar with the basics of launching and editing with Emacs, and you should already know the essentials of copying stuff into your .emacs file, and debugging things (or finding a friendly Emacs Wizard) when something goes wrong.

Not all the tips are customizations to Emacs; some of them are changes to your desktop environment to make it work more seamlessly with Emacs.

The key to understanding Emacs is that it's all about efficiency, which includes economy of motion. Any trained musician will tell you that economy of motion is critical to becoming a world-class virtuoso. Any unnecessary motion is wasted energy and yields sloppy results.

Using the mouse is almost always the worst possible violation of economy of motion, because you have to pick your hand up and fumble around with it. The mouse is a clumsy instrument, and Emacs gurus consider it a cache miss when they have to resort to using it.

Compared to Emacs Wizards, graphical-IDE users are the equivalent of amateur musicians, pawing at their instrument with a sort of desperation. An IDE has blinking lights and pretty dialogs that you can't interact with properly (see Item 6), and gives newbies a nice comfortable sense of control. But that control is extremely crude, and all serious programmers prefer something that gives them more power.

IDEs also offer Refactoring tools, which are all the rage, because they help you automatically fix your screwed-up code. This is fine, as far as it goes, but I'll tell you a secret: Refactoring tools don't understand English. They won't help you one bit when you're doing something that the tools weren't designed to handle. Refactoring tools are cookie-cutter solutions; Emacs offers you a level of fine-grained control over your environment that makes you the equal of any editing challenge.

However, as I often point out, this has to be seen to be believed, and even if you believe it, you need to make a serious, lifelong commitment to Emacs in order to master it. Mastering it involves learning Lisp and customizing Emacs to the finest degree imaginable. This simply serves to increase your hunger for more control and more automation, so even if you've mastered Emacs, you're never really finished extending it.

So it's not an editor for the faint of heart, and this blog is targeted at people who have already made the commitment, and want to improve their mastery of this elegant, timeless piece of software.

The rest of you: I think your Eclipse just finished launching, so you can get back to work now.

Item 1: Swap Caps-Lock and Control

On Windows and Mac keyboards, the Ctrl key is awkwardly located in the far lower-left position on the keyboard. The Ctrl key is critical to using Emacs at all times, so you'll never become an Emacs virtuoso unless you move it to an easier position. That position should be on Home Row, so Caps Lock is the best choice. That's the location of the Control key on most Unix workstation keyboards, for precisely that reason.

To do this on Windows 2000 or XP requires some registry hacking. From the Start menu, choose Run and enter "regedit". In the left-side tree view, click down to:

HKEY_LOCAL_MACHINE\SYSTEM\CurrentControlSet\Control\Keyboard Layout

Click on the KeyboardLayout entry to give it the focus. Make sure it has the focus and not one of its children. Then from the Edit menu, choose New Binary Value, and name it Scancode Map. It should show as type REG_BINARY.

Then select the new Scancode Map entry you just created, and from the Edit menu (whose contents should have changed), choose Modify Binary Data. In the dialog box called Edit Binary Value, enter the following data:

 0000: 00 00 00 00 00 00 00 00
0008: 03 00 00 00 3A 00 1D 00
0010: 1D 00 3A 00 00 00 00 00

Select OK to close the dialog, then exit the Registry Editor. The caps and ctrl keys should be swapped as soon as you log out and back in again. It may require a reboot.

On Linux in X-Windows, you use the xmodmap utility. Create a file in your home directory called .xmodmap if it doesn't already exist, and put in the following lines:

 !
! Swap Caps_Lock and Control_L
!
remove Lock = Caps_Lock
remove Control = Control_L
keysym Control_L = Caps_Lock
keysym Caps_Lock = Control_L
add Lock = Caps_Lock
add Control = Control_L

Save it, and add the line xmodmap ~/.xmodmap into your ~/.bash_profile.

On Mac OS X (Panther and Jaguar) you need to install a modified keyboard driver, which is a little scary, but it seems to work. Here's a discussion of the driver. Alternately, if you're not using a Mac laptop, there appears to be an XML file you can edit as root; it's described here.

This URL has some information on doing it on other systems.

Item 2: Invoke M-x without the Alt key

Alt-x is one of the most frequently typed Emacs key combos, and it involves scrunching your left hand up. Anything you're going to do thousands of times should be streamlined, so you want to be able to start a M-x sequence with the Ctrl key (once you've completed Item 1!)

There's another very important reason to get in the habit of using a Ctrl sequence: the Alt key is unreliable and nonstandard across platforms. In particular, when you're logged in to a remote host via telnet or ssh, Alt-x may or may not work, depending on the system type and the terminal configuration. Rather than mess with the headache of learning to configure every system you work on to know about the Alt key, it's easier to use a key sequence that always works.

The key sequence I use is Ctrl-x Ctrl-m. Note that when you invoke a 2-key sequence with the same modifier key, you can just hold down the modifier key, then press the 2 keys. So with this key sequence, invoking M-x involves pressing and holding Ctrl, typing x, then typing m.

To enable the Ctrl-x Ctrl-m sequence add the following lines to your .emacs file:

(global-set-key "\C-x\C-m" 'execute-extended-command)
(global-set-key "\C-c\C-m" 'execute-extended-command)

I add the second line so that Ctrl-c Ctrl-m will also invoke it, which makes the key sequence even more forgiving. If I miss Ctrl-x and hit Ctrl-c accidentally, it still works. Neither of these key sequences is bound by default in Emacs, so you're not biffing any other useful shortcuts by doing this.

You should practice this key sequence until you get used to it, and then you'll almost never need to use Alt-x again. (You'll still use the Alt key for other commands, which I'll cover later.)

Incidentally, if you want to fine-tune this tip to extraordinary levels, then you probably don't want to use your ring-finger for typing the x-key when you hit Ctrl-x. I use my left index finger, since I'm used to it that way, but you're probably better off using your left middle finger. The reason is that your hand isn't technically on home row when your left pinkie is jammed down on the Caps-Lock key that you've turned into Ctrl. The point is to use whatever requires the least amount of stretching, followed by the least amount of finger motion. You should experiment until you find what's most comfortable for you.

Item 3: Prefer backward-kill-word over Backspace

Emacs Wizards try to avoid hitting the backspace key, because it's just remote enough from home-row to be annoying. We make typing mistakes all the time, but if you type faster than about 50 wpm, it's more economical to kill the entire word and re-type it than to painstakingly backspace to your error.

Here's what you add to your .emacs file:

(global-set-key "\C-w" 'backward-kill-word)
(global-set-key "\C-x\C-k" 'kill-region)
(global-set-key "\C-c\C-k" 'kill-region)

Note that because Ctrl-w was already bound to kill-region, a very important command, you need to re-bind something else to kill-region. I chose Ctrl-x Ctrl-k (and its sloppiness-forgiving companion, Ctrl-c Ctrl-k), primarily because that's the way they did it at my old company, which was filled with wise Emacs Wizards who taught me a lot of what I know. Rebinding Ctrl-x Ctrl-k means it's no longer available for edit-kbd-macro, but you'll use that infrequently enough that it's not something you'll miss having a shortcut for.

As an added benefit, many Unix command shells provide Emacs-like command-line editing keys, and Ctrl-w is usually the default binding for backward-kill-word. So your usage will be consistent in shells.

The faster you type, the more valuable this tip becomes. You'll gradually develop a "feel" for the fastest way to back up and correct various kinds of typing mistakes. In general, here's how my fingers decide these days:

  1. If I've mis-typed a character or two in a fairly long word, and my cursor is still located right after the typo, then I'll use the backspace key.

  2. If the typo is somewhere in the last 15 to 20 characters or so, then I'll usually backward-kill-word to kill backward over the typo, and re-type the words.

  3. If the typo is further back than that, but still on the same line, I'll use Alt-B to skip the cursor back to the word with the typo, and Ctrl-b to move it within the word to get to the typo.

For mistakes further away, I'll use Fast Navigation to get there: Item 4 covers at least part of this technique.

One thing you'll need to be very careful of if you use Ctrl-w for backward-kill-word: Ctrl-w is hardwired to kill the window in many Windows applications. Do not pass go, do not collect $200, and in browser windows, do not save the contents of your form fields. That means if you're typing out something into an HTML form field, and you accidentally make a typo and hit Ctrl-w, kapow! All your work will be lost instantly for you by Good Ole Microsoft Windows. I know of no way to override this horrid behavior. If you know, please tell me.

Item 4: Use incremental search for Navigation

Moving the cursor around efficiently is one of the keys to becoming an Emacs Wizard. IDE users spend most of their time fumbling around with the mouse. They wouldn't dream of doing it any other way, but they don't realize how inefficient their motions are. In the hands of a Master, Emacs becomes the most powerful and efficient text-editing tool on the planet, in large part because it allows you to do almost everything without using the mouse.

Emacs Wizards always have their Emacs sessions as tall as possible, filling the screen vertically, because vertical screen space is such a premium when you're viewing a document. When you can view a fair number of lines of text on screen at once, using incremental search is often much faster than any other way of precisely positioning the cursor.

Get in the habit of using Ctrl-r (isearch-backward) and Ctrl-s (isearch-forward) for moving around in the document. Whenever you need to jump the cursor backward or forward more than about 5 lines, and you can see the target location, you should be using i-search.

To do it effectively, you don't necessarily need to search for the exact word where you want to put the cursor. Let your eye defocus slightly and take in the whole paragraph or region around the target point, and choose a word that looks reasonably unique or easy to type. Then i-search for it to navigate to it. You may need to hit Ctrl-r or Ctrl-s repeatedly if your anchor word turns out not to be unique. But Emacs will highlight all the matches, so if there are more than a couple of them, Ctrl-g out of the search and choose another anchor word.

It's difficult to overemphasize how powerful this technique is, once you've mastered it. Mastering it simply requires that you do it repeatedly until your fingers do it "automatically". Emacs eventually becomes like an extension of your body, and you'll be performing hundreds of different keystrokes and mini-techniques like this one without thinking about them. It's comparable to the hundreds of subtle techniques you acquire for driving a car well.

Item 5: Use Temp Buffers

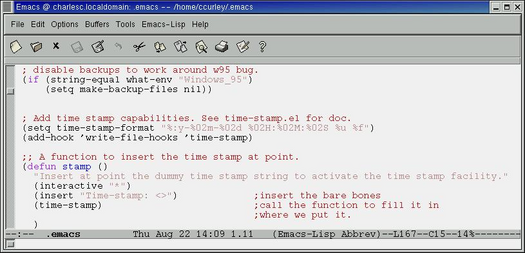
One of the most powerful things about Emacs is its ability to swiftly generate a new buffer that isn't associated with a file or process. Once you get used to using this technique, you'll sorely miss the functionality in other editors and applications.

To create a temp buffer, just switch to it! Ctrl-x b invokes the command switch-to-buffer, and you just type in adsflj or whatever comes out of drumming on the keyboard. Instantly you've got yourself a scratchpad, where you can take notes, dump temporary results, or use it in any way that's convenient for the problem at hand.

If you plan on keeping multiple temp buffers around, you might give them more memorable names, such as foo, bar, baz, and buh.

If you want to see your temp buffer side-by-side with another buffer, you can split the screen horizontally or vertically. See Item 6.

Because your temp buffers aren't associated with a file, you can kill them just as quickly as you created them using Ctrl-x k, the kill-buffer command.

If you decide you want to save the contents of a temp buffer somewhere, just switch to the buffer and Ctrl-x Ctrl-w to invoke the write-file command. It will prompt you for a filename, and after saving, you can kill the buffer safely and revisit the file contents later.

Item 6: Master the buffer and window commands

You'll frequently want to do some editing task and have multiple windows open. Emacs uses slightly different terminology from most other applications. A "buffer" is a logical space that contains some text, possibly tied to a file or process. A "window" is a visible region on screen displaying exactly one buffer (or part of it). A "frame" is what you call a "window" in OS-lingo: a standalone window with its own title bar and so on.

The most important commands to master are:

  • Ctrl-x 2: split-window-vertically -- splits your current window into two equal-height windows showing the same buffer (until you change one of them to show something else.)

  • Ctrl-x 3: split-window-horizontally -- most people don't use this as often, but it's occasionally useful. Splits the window into a left-side and a right-side.

  • Ctrl-x +: balance-windows -- makes all visible windows approximately equal height. This is useful if you've just done Ctrl-x 2 twice in a row, because you'll have two 1/4-height windows and one 1/2-height window. Ctrl-x + makes them all the same height.

  • Ctrl-x o: other-window -- moves the cursor into the next window in the window list, which usually means moving it to the window below the current one, or wrapping back up to the top.

  • Ctrl-x 1: delete-other-windows -- makes the currently focused window fill the entire frame; the others go away. Note that the buffers they were visiting stay around in the buffer-list, so it's always perfectly safe to execute this command.

  • Ctrl-x Ctrl-b: list-buffers -- shows a list of all the buffers you have open, in a nicely formatted buffer called "*Buffer List*". This buffer's mode has many convenience keys for manipulating the buffer list. For instance, typing "d" while the cursor is on one of the entries will flag that buffer for deletion, "x" will kill the buffer, and so on. Use M-x describe-bindings to view all the Buffer-menu key bindings.

Dialog Boxes: The Root of All Evil

Emacs is an incredibly powerful editor, but a few design choices in particular really stand out as being the biggest individual contributors. One of them is the fact that Emacs has no dialog boxes. This was actually a requirement in order to give Emacs its full functionality while running in a text-only terminal window. But by happy accident, it's also one of the key features that helps make Emacs so insanely powerful.

Dialog boxes suck. For starters, they always have focus issues, and often cause poorly-designed applications to lock up or fail to refresh while the dialog is open. And dialog boxes never seem to play along with any customizations to your video mode. For example, if you set up a dual-monitor display using 2 cards, the application dialogs in Windows will tend to pop up in the wrong window, making the whole experience a really annoying pain in the ass.

Dialogs sometimes come up in unpredictable places even on single-monitor machines. And even in well-designed applications like the Microsoft Office suite, modal dialogs can still wind up buried behind a bunch of other windows on your screen, which makes the application seem like it's totally unresponsive until you find the rogue dialog and bring it to the front.

For some strange reason, dialog boxes are often non-resizable. It's the opposite for application windows: those are almost always resizable, and app designers usually take great pains to make the UI rearrange to fill the space nicely if you resize the window. But with dialogs, the default seems to be non-resizable, possibly because on most OSes, dialogs are a screwed-up hack that was added on long after the window manager was designed without dialogs in mind. (Guess how I know this.) Hell, they're even a mess in Java Swing.

And don't get me started on the buttons. We've had dialog boxes in GUIs for at least 25 years, but people still can't agree on a standard set of buttons for them, or even a standard place to put the buttons. Some dialogs put them in the title bar, some on the bottom, some on the right side. And it's rarely 100% clear what will happen if you use the Window controls in the title bar to close a dialog, bypassing its button choices. The whole experience is a giant crap sandwich, and everyone knows it intuitively, but it's just how everyone assumes things have to be.

But the problem with dialog boxes goes even deeper than the focus, sizing and positioning problems. Dialogs are never, ever full peers of the rest of the application UI. If you define any keyboard macros (not just in Emacs -- in any app, such as Excel or Word), they won't work in dialog boxes. If the dialog has a scrollable widget, you have no options for navigating other than by using the scrollbar.

To illustrate, fire up Internet Explorer and choose Internet Options from the Tools menu. Go to the Advanced tab. There they are: all your pathetic global customization options for IE. If you want to find a particular option, you have to scroll slowly, looking for it. You can't use Edit/Find because the dialog is, of course, modal. And the dialog is, of course, also non-resizable. Most dialogs are like this.

Buffers to the Rescue

In Emacs, all output goes into buffers, and all buffers are first-class citizens. All your favorite navigation shortcuts are available in all buffers, including i-search. You can select and copy text out of any buffer, and there is no such thing as a "modal" buffer, so you can keep the output around as long as you like, while continuing to work in other windows. It doesn't even have to be visible; the "dialog" output stays in the buffer list until you dismiss it.

There is nothing else quite like the Emacs buffer experience in all of application-dom. Once you realize how consistent and powerful this model is, all other applications become slightly distasteful, because you know their UI is just getting in your way.

Once you learn to master those buffers and windows, and sling them around with ease, you'll be on your way to Emacs Wizardhood.

Item 7: Lose the UI

You don't need a menu bar. It's just a crutch placed there for disoriented newbies. You also don't need a toolbar with big happy icons, nor do you need a scrollbar. All of these things are for losers, and they are just taking up precious screen real-estate. Turn them all off with the following code in your .emacs file:

(if (fboundp 'scroll-bar-mode) (scroll-bar-mode -1))
(if (fboundp 'tool-bar-mode) (tool-bar-mode -1))
(if (fboundp 'menu-bar-mode) (menu-bar-mode -1))

You won't miss any of it. We'll cover how to find your way around in the next tip.

(Notes added Jan 2nd, 2006) I recently saw a comment from a person who hated this entire essay because of tip #7. The person expressed a great deal of disgruntlement, evidently being quite attached to his or her mouse and menus, and took affront to being called a "disoriented newbie". The person went on to claim that using the mouse has been proven "faster" by countless studies. So I figure I should elaborate a bit. The remainder of this tip is All New, thanks to that disgruntled reader's blog.

First I should observe that I often wish Emacs had a richer rendering engine, enabling it to do GUI and graphics on par with other desktop applications. It may never happen; my blog-rant The Emacs Problem talks about this a bit. But I'd love to see it. I bring this up as evidence that I'm not a thoughtless anti-GUI person.

Scrollbar: optional

I usually turn off the scrollbar in Emacs because there are keystrokes that can achieve the same effect. However, scrollbars have the advantage of providing analog feedback as to how far into the buffer you are, and how long it is. The digital feedback provided by the %-indicator in the status area isn't as easy to read -- countless studies have proven that. It's why the U.S. Navy uses analog gauges in their reactor plants, for instance. It's too easy to glance at a digital (i.e. numeric) gauge and misread it.

So I have no real problem with scrollbars, if you're more comfortable with them. Just be aware that they'll tempt you to reach for the mouse, but for certain operations (e.g. jumping to the beginning or end of the buffer), it's much faster to use the keyboard. No user studies are necessary to justify this claim, either. Some simple timing experiments should convince even the most skeptical reader.

Keyboard wins for navigation

Let's say we want to put a row of 80 hyphens at the very beginning and very end of a long buffer, and you're currently in the middle of the buffer. It's slightly contrived, but I've done it when putting together a "cut here" excerpt containing the buffer contents. Using the keyboard, I'm done in under 3 seconds, ready to move on to the next task. The key sequence I had to type was "C-x t C-u 8 0 - RET C-x e C-u 8 0 -", or 13 key presses.

There's simply no way you could do this reliably in 3 seconds with the mouse, since you'd have to make 2 complete round-trips to the mouse, to grab the scroll button (aka "thumb" or "elevator") and drag it to the top or bottom, then return to the keyboard to type out the text. A quick trial took me close to 15 seconds. Scrolling to the top does NOT move the cursor to the first character, so you also have to carefully position the cursor there.

Sure, you could practice it a bit, and maybe get it down to 10 seconds, but why bother? If you're going to do that exact operation frequently, you should write a macro for it.

Mouse use case #1 of 1: region selections

There are clearly some operations that will be faster with the mouse. Interacting with your window system outside Emacs is usually faster with the mouse, as is interacting with other applications that don't have Emacs-like keyboard navigation. But inside Emacs, I can only think of one thing that's faster with the mouse: region selection, particularly if you're selecting a rectangle.

Sometimes region selection with the keyboard is faster: for instance, setting the mark and holding down Ctrl-n to start selecting lines, or Ctrl-f to grow the selection by a character at a time. But the keyboard repeat rate, which is set in hardware, can feel annoyingly slow. I can see about 100 lines of text in a buffer window on my display, and selecting those lines with the keyboard (assuming I'm starting with the point somewhere in the middle) takes about 5 seconds. Selecting them with the mouse and returning to home row takes about 4 seconds. So when I just need to select lines in the visible area, the mouse usually isn't worth it.

However, if I need to select a region that's taller than my window size (by drag-selecting), or I need to select a region whose beginning and end columns both fall mid-line somewhere, then the mouse is the most reliably fast approach, and I'll use it happily.

Using the mouse for selections isn't turning off the UI, though, so it's only slightly related to this tip. The point is that I actually do timing experiments like this once in a while. My opinions about the GUI in Emacs are backed by 20 years of this kind of experimentation. And I'm recommending that you turn off the menus. Really.

Menus: lose 'em!

Menus are fine for exploration, for learning more about Emacs's capabilities. Unfortunately they can easily lull you into thinking the cover everything Emacs can do. However, many Emacs packages don't have any menu support -- it's only the super-meticulous package designer who goes to the effort of adding menu support. So if you're using the menus for browsing and exploring Emacs, you're missing out on a lot of functionality.

Another problem with menus is related to my rant about dialogs earlier: they don't scale well. If you want to provide the user with 1500 choices, putting them in a menu will tax the windowing system to the limits of its ability. Doing it in an Emacs buffer is trivial, and gives you a lot more real-estate in which to do nice layouts and groupings of the choices. Type M-x list-colors-display or M-x list-faces-display to see some examples of what I mean.

Another (huge) problem with menus is that they're not searchable, and they don't do auto-completion. You can easily find yourself digging way down some submenu heirarchy, thinking you're getting close, but you're actually barking down the wrong tree. They're nowhere near as flexible an exploration mechanism as searchable help -- this is every bit as true in Microsoft applications as it is in Emacs.

And finally, once you've memorized a menu action, you always have to go back to the menu (and possibly submenus) to perform it. The more often you do the action, the more time you've wasted compared to using a keyboard shortcut.

So I think Emacs menus are no good. They don't show you everything Emacs can do; they don't suggest alternatives when you can't find what you want; they're not capable of scaling to thousands of choices (so they're not a very good general-purpose UI mechanism, compared to something like a tree view), and they're slow to access even when you know how to use them.

In short: turn off those menus! And as for big shiny buttons, well, gosh. Anything important enough for a button is important enough for a fast keyboard shortcut.

Item 8: Learn the most important help functions

To find out all the keyboard shortcuts that are defined for the current buffer, type M-x describe-bindings. It shows you a list of keys and the commands that they're mapped to.

If you move the cursor to one of the commands in this list, and hit Enter, it'll show you the Help for that command.

To find out what a particular key does, use M-x describe-key, and then type the key sequence you're interested in. It goes directly to the Help for that key, if the key is currently bound to a command.

If you're interested in finding a command, and you have a guess as to the name but you aren't sure exactly what it's called, use M-x apropos, followed by a regular expression (see Item 9) to use for matching command names. All Emacs commands (as well as functions variables, and property lists) are kept in global tables that can be searched with M-x apropos.

If, for instance, you're looking for a function that sends a buffer all the way to the back of the list, you could type M-x apropos-command buffer, which shows about 200 available commands with the word "buffer" in the command name. Near the top is a command, bury-buffer, whose documentation says:

bury-buffer   M-x bury-buffer RET Command: Put BUFFER at the end of the list of all buffers.

Et voila. Just the command you were looking for. You can easily winnow the search through large lists by specifying a more restrictive regexp.

Perhaps the most important Help function is M-x info, which brings up Emacs's interactive, menu-driven Info engine. You should learn to use Info. It has thousands of pages of documentation, and it's hyperlinked (in its own custom way that predates the Web, unfortunately), so it's much easier to navigate than, say, man pages. Once you've mastered the navigation keys in Info, it's faster than navigating HTML help with a browser, even for local static files, in part because of Info's ability to perform searches across multiple info files, and in part because Emacs simply has better navigation capabilities than any web browser.

Item 9: Master Emacs's regular expressions

The best way to do this is to get yourself the Friedl Book, Mastering Regular Expressions. It's worth it. Every programmer should have a copy, no matter what language or editor you're using.

Emacs's regular expressions have some idiosyncracies that everyone dislikes, but they're not insurmountable, and once you've learned them, it opens up new horizons in editing power.

Two important regexp-related commands are isearch-forward-regexp and isearch-backward-regexp. These are by default bound to ESC C-r and ESC C-s, respectively. Those keys are lame, though. Any sequence that requires hitting the actual Escape key is lame, and Alt-Ctrl-s on my Compaq machine is invisible to Emacs; it brings up a system diagnostics dialog.

I have the isearch-*-regexp commands bound to Alt-r and Alt-s, since I use them so much. Alt-s isn't normally bound. The default Emacs binding for Alt-r is the command move-to-window-line, which you won't need, because you'll use Item 4 for moving around within the window.

Some modes insist on re-binding Alt-r and Alt-s, which is annoying, and I have a bunch of per-mode hacks to re-bind them, but I don't have all modes covered. If someone can suggest a way to bind Alt-r and Alt-s in such a way that they can't be overridden by any modes, please let me know -- I'd be muchly appreciative.

The next two important regexp-related commands are replace-regexp and query-replace-regexp. They function identically, prompting for a regular expression and a replacement string, but query-replace-regexp prompts you to type y or n for each possible replacement.

I use query-replace-regexp so frequently that I have an alias for it:

(defalias 'qrr 'query-replace-regexp)

That way I can type M-x qrr to invoke the function.

Other useful commands that take regexps are M-x list-matching-lines, which shows you all the lines in a buffer that match some regexp, and M-x apropos, which shows you all commands whose names match a given regexp.

The most Frequently Asked Question about Emacs regexps is: "How do I insert a newline into a regexp or the replacement string?" Hitting the Enter key simply tells the command that you're done entering the regexp, and it starts doing the replacements. (This is a very good reason for preferring query-replace-regexp over replace-regexp until you're 100% confident that your regexps are right on the first try. I'm still not there yet.)

The answer is that you need to insert a ^J character, which Emacs uses to represent newlines in functions and commands. At the point in the regexp or replacement where you need to insert a newline, hit Ctrl-q followed by Ctrl-j. Ctrl-q is Emacs's "quote" command: rather than executing the following keystroke, Emacs will insert the key into the current buffer or the minibuffer.

Some other useful things to know about Emacs regular expressions:

  • You need to double-escape ("\\") regexp metacharacters in strings in elisp code, but you single-escape them when entering regexps at the minibuffer.

  • Emacs code does so much matching of parens that Emacs regexps reverse the paren character and metacharacter. In an Emacs regexp, "(" and ")" match actual parens, while "\(" and "\)" create matching groups.

  • In the replacement string, use \1, \2, etc. for inserting match-groups from the regexp.

  • If you enter in a regexp and it doesn't work, undo the result if the command actually changed anything. Then type the command again, and when it prompts you, use the arrow keys to scroll up and down to find your regexp and replacement string, and modify them in place. This can save you a lot of typing and frustration.

  • You can yank text into the middle of a regexp you're typing out with most regexp commands, but NOT in the isearch-*-regexp commands. Yank does weird things in those. I'd love to know how to fix this.

Mastering regular expressions and the commands that use them is one of the most important components of becoming an Emacs Wizard.

Item 10: Master the fine-grained text manipulation commands

Emacs provides many small but useful commands for doing surgery on text. They add up to laserlike efficiency.

For starters, don't be tempted to re-bind Ctrl-k to a function that kills the whole line including the newline. I know that's the way kill-line works in all other editors. But it's clumsy and coarse compared to the way kill-line works by default. The default behavior, which kills the text to the end of the line but doesn't kill the newline, gives you finer-grained control, and leads to more efficient text surgery on the whole. Trust me: all Emacs users use other applications that only support the fat-fingered kill-whole-line version, so they've had plenty of opportunity to use both approaches. There's a reason the default is the way it is.

Keyboard Macros

I believe I can state without the slightest hint of exaggeration that Emacs keyboard macros are the coolest thing in the entire universe. They are, in a sense, as fine-grained and special-purpose as it gets, because you create them on the fly to solve specific editing problems. Whenever you find you need to make a specific, patterned change more than, say, 10 to 15 times, create a keyboard macro. It's really easy to do.

First it helps to do a trial run on the macro. Once you've done that, put your cursor at at the beginning of the first place to change, and use Ctrl-x ( to start recording the macro. Make your edits, and make sure to put the cursor in the corresponding place on the next line (or several lines down, as appropriate), so the macro will execute exactly the same pattern every time. To stop recording, type Ctrl-x ), and to invoke the macro, use Ctrl-x e (call-last-kbd-macro).

It's something of an art to define a robust macro -- you learn to use anchors like beginning-of-line and end-of line to make sure the macro is in a stable point before adding another action to it.

And incremental-search is useful for skipping forward to the next place to invoke the macro: if you use isearch within the macro, to find the place to start, then each invocation of the macro later will automatically perform the search each time. Very convenient.

And it's OK to make minor navigational mistakes while recording the macro. Just move the cursor back to where it should be and keep recording. The mistake will be replayed every time you execute the macro, but it'll happen so fast you'll be unlikely to notice.

The trick to getting good at macros is to be persistent: make sure you get the macro working, and don't give up, even if it means spending more time fiddling with the macro than making the edits manually. The next time around it'll be easier, and eventually they'll become second nature. Keyboard macros are one of the most powerful features of Emacs, and they can make your life much easier.

One last tip for keyboard macros: typically you'll play them dozens or even hundreds of times in a file, or across multiple files. You should bind call-last-kbd-macro to a single keystroke, such as the F5 key. You'll usually be "babysitting" the job, pressing the key over and over, watching the changes as you make them to ensure you don't hork something unintentionally. So it's fine to have it bound to a "faraway" key like F5. You can set it up like so:

(global-set-key [f5] 'call-last-kbd-macro)

Transpose-* functions

Finally you'll find the transpose-* commands surprisingly useful once you get used to them, even though they look like gimmicks. Probably the most useful is transpose-words. You'd be amazed at how often you find yourself using this command, which is bound to Alt-t. It has two uses: swapping two adjacent words, and dragging a single word forward or backward in a sentence.

The transpose-words function is aware of mode-specific syntax and word boundaries, so, for instance, putting the cursor between these two words:

([this])-is

and hitting Alt-t will result in:

([is])-this

You can transpose words across hyphens, HTML tags, and basically all punctuation. It's a pretty handy feature when you need it.

When you transpose 2 words, e.g. "dog food", the leftmost word swaps with the rightmost (assuming the cursor is somewhere between the beginning of the first word and the end of the second one), resulting in "food dog". But the cursor moves so that it's still to the right of the word that moved to the right. So if you apply it repeatedly, the word moves along the sentence to the right. I don't think there's a built-in way to make a "drag-word-left", but it would be easy to write a short function to do it. The corresponding Eclipse plug-in would be 5,000 lines of code in 60 source files and would take nine days to write and debug.

You can also transpose chars, lines, sentences, and paragraphs. These are all useful as you perform editing operations on your raw text and even your source code. Experiment with them and try to remember that they're there, and eventually they'll also become second-nature.

Tune in next time...

At some point I'll have collected and documented 50 tips, at which point Scott Meyers can just eat his heart out. I made a valiant effort to do them all in one sitting, but I gave up just now and changed this blog's heading from "50 Specific Ways..." to "10 Specific Ways..." At least I did it this entry all in one sitting of a little over 2 hours. An Eclipse user would have spent that much time digging through the manuals, looking for a refactoring tool that can write blogs. Fat chance.

For upcoming tips, a few that come to mind as being particularly useful are:

  1. fill-paragraph (Alt-p) -- intelligently line-wraps your text for you: an absolute must, and it works inside source-code comments.

  2. gnuserv: automatically open certain document types (including View Source in your browser) in Emacs.

  3. M-x Dired: a powerful way to manage your files and directories. It can do things that NO other tool can do (at least that I'm aware of), including renaming arbitrary groups of files from one regexp to another.

  4. whitespace-manipulation commands: C-x C-o (delete-blank-lines), delete-trailing-whitespace, tabify and untabify, indent-region, and so on.

  5. nxml-mode: the ONLY way to fly when you're editing XML. Authored by XML guru James Clark; it knocks the socks off any IDE-based XML editor out there today.

  6. picture-mode: the best way to draw ascii art, and useful in a surprising number of situations.

  7. minibuffer management: mastering recursive edits, learning how to abort from various situations, command completions, and other command-entry trickery.

  8. effortless navigation: re-bind a few keys so that you can move the cursor in any direction, by chars or words, by holding down Alt and just pressing various letter keys.

  9. region management: choosing a non-disgusting color for the highlighted region, covering region-related commands.

  10. rectangle commands: yet another incredibly important set of related commands with no analogues in other editors. Once again, you'll wonder how you lived without them.

  11. emacs shells: tips and tricks for getting the most out of a bash command shell running as an Emacs subprocess.

  12. align-regexp: my new favorite command. just learned it recently, and I use it almost every day.

  13. frame initialization: put Emacs exactly where you want it, every time it starts up, by auto-detecting the screen dimensions and computing where it should be.

  14. using the goal column: things every Emacs power-user should know.

  15. setting the fill column: how to get the most out of fill-region and fill-paragraph.

  16. optimizing OS settings, such as speeding up your keyboard repeat rate, choosing an ideal Emacs font, and so on.

  17. browsing and editing archives: tar, gzip, zip, jar, etc. Most people have no idea this feature exists, and it's nothing short of amazing.

  18. advanced keybinding: learn the syntax for binding function keys, home/end, and other oddball keys. Learn how to make keybindings local to a particular buffer or mode.

  19. mastering the kill ring, including using Derek Upham's fancy new mode for viewing its contents.

  20. mastering Info: customizing your Info dir, finding and adding in new Info files, and advanced navigation and bookmarking.

  21. using M-x customize: learn how this beast works, and how to use it or avoid it as needed.

  22. utility apps: M-x calendar, M-x calc, and others.

The list goes on and on... ah, well, I'll get around to them someday.

And with that, it's a wrap! I'm heading to bed.

published Jan 23, 2005
last update, Mar 12, 2006


Comments

Some random comments:

To yank at the i-search prompt, use M-y instead of C-y. The emacs info node on Incremental Search talks about the rebinding of C-y, C-w, etc at the i-search prompt.

To repeat execution of the last kbd macro, after hitting C-xe to run it once, keep hitting just the 'e' key for repeated execution.

Zap-to-char (M-z) is incredibly useful if you need to change myDatafileHandler to myStreamHandler and point is at D (the first char to change). Simple M-z e to zap the "Datafile" part and type in the replacement. This is not orthogonal to the backward-kill-word (bound to C-backspace for me since that works in windows browser windows as well as everything else) so there's a feel needed for which is optimal when, which for me mostly depends on where point is already.

Thursday, October 25, 2007

Gphone OS

Google is working on a mobile OS, and it's due out shortly

Posted Aug 28th 2007 2:07PM by Ryan Block
Filed under: Cellphones, Features
Can it be true? Is the Googlephone nigh at hand? Not that we haven't been hearing this time after time (after time after time, etc.), but we've actually got some hot news from a number of very trustworthy sources about Google's plans for the mobile space. Namely, Google's mobile device platform is well on its way, and will be announced in the very near future.

We understand that the "Gphone OS" (our name for it, not theirs) began development after Google's very quiet 2005 acquisition of mobile software company Android, started by Danger cofounder and former-prez / CEO Andy Rubin. At Google, Andy's team has developed a Linux-based mobile device OS (no surprise) which they're currently shopping around to handset makers and carriers on the premise of providing a flexible, customizable system -- with really great Google integration, of course.

As for the timeframe on this thing, we keep hearing Google will announce its mobile plans some time post-Labor Day (September 3rd); from what we've heard Google isn't necessarily working on hardware of its own, but is definitely working with OEMs and ODMs to get them to put the Gphone OS on upcoming devices. Think of it more in terms of Windows Mobile or Palm OS (in the early days) -- Google wants to supply the platform, but we don't think they want to sell hardware. Still, don't entirely rule out the idea. Andy Rubin knows how to make a device and put it in peoples' hands, so nothing is impossible on the hardware side. Either way, we're totally stoked to peep the software, we've been waiting for the Googlephone for years on years.

Still, we can't help wondering what El Jobso thinks about all this. Apple has been so buddy-buddy with Google lately, especially on the iPhone -- and now Apple's mobile team is on the verge of outright competition with one of its closest partners. We know that's how the industry works, but it's got to sting a little, you know?

Google Phone (or gPhone)

Google Phone (or gPhone) is a potential mobile phone or smartphone speculated to be connected with search engine giant Google. The speculation that Google would be entering the mobile phone market with a gPhone was first raised in December 2006 by writer Martha McKay in The Record.[1] Since that time, reports from both the BBC and The Wall Street Journal (WSJ) noted that Google wanted "Google search and Google applications on mobile, and it is working hard every day to deliver that." Further, it's now believed that Google is "showing the prototype to cellphone manufacturers and network operators as it continues to hone the technical specifications." As many as about 30 prototype gPhones are reported to be operating "in the wild".[2] InformationWeek in its recent story reported that Google has filed several patent applications in the area of mobile telephony, which hint at the arrival of gPhone in the near future.[3] Network World reported that Google’s GPhone is actually an open source software phone operating system, rather than a specific hardware device like the iPhone.[2] Phoronix has reported that Google is "looking to team up with OpenMoko" for the gPhone.[4] OpenMoko is a project to create a smartphone platform using free software, including the Linux kernel.

Sunday, October 21, 2007

Bluetooth: Command-line

Bluetooth

Devices with Bluetooth include phones, PDAs, keyboards and mice.

Package(s)

Subsystem

  • bluez-utils / bluetooth - www.bluez.org - tools and system daemons for using Bluetooth devices. Provides ciptool, dund, hcitool, hidd, l2ping, pand, rfcomm, sdptool.
  • bluez-firmware - this firmware is required for operation of Bluetooth dongles based on the Broadcom BCM203x 'Blutonium'chipset [non-free]. This is for Linux 2.6 kernels, for Linux 2.4 kernels the package was called bluez-bcm203x [contrib].
  • bluez-cups - www.bluez.org - Bluetooth printer driver for CUPS
  • bluez-pcmcia-support - www.bluez.org - support for PCMCIA Bluetooth adapters. As it depends on both Bluetooth and pcmciautils I only recommend this if you specifically have a Bluetooth PCMCIA adapter.

GNOME

  • bluez-gnome - bluez.sourceforge.net - provides Bluetooth preferences and a GNOME applet for prompting when a Bluetooth passkey (PIN) is required. The applet pops up in the system tray when you insert a Bluetooth device and provides access to the Bluetooth preferences. Log out and back in again for this to take effect. This package is installed by the virtual package bluez-passkey-gnome.
  • gnome-bluetooth - tragically not included in Debian 4.0/Etch. It's available in Debian Testing and will be included in Debian Lenny.
    The gnome-bluetooth package includes gnome-obex-server (for receiving files) and gnome-obex-send (for sending files). gnome-bluetooth-manager (for configuring Bluetooth devices) is planned for future inclusion in gnome-bluetooth; you can see the plans for it at live.gnome.org/GnomeBluetooth.

    There's an unofficial repository where you can get gnome-bluetooth, nautilus-sendto, libgnomebt0 and libbtctl4 by adding the following repository source for Debian Testing and Unstable, not Stable (though in April 2007 I found the testing package to work with Debian 4.0/Etch) (I don't know if these people are trustworthy or not): deb http://download.tuxfamily.org/osrdebian testing gnome-bluetooth. Their key is available at download.tuxfamily.org/osrdebian/index.html.
  • nautilus-sendto - an updated version of Ubuntu's nautilus-sendto that includes Bluetooth support, as opposed to ther version already included in Debian

File Transfer

  • obexftp - command-line file transfer utility for devices that use the OBEX protocol (think-future.de/wiki/index.php?title=Bluetooth)
  • obexpushd - command-line utility for receiving files via Bluetooth or IRDA (how does this differ from obexserver?)
  • ussp-push - Client for OBEX PUSH - allows you to send objects using the OBEX PUSH protocol. The OBEX PUSH protocol is used to transfer files to a mobile device, generally via Bluetooth or IrDA. The protocol does not allow any other action than sending and generally requires less strict authentication, which is why it is sometimes preferred to the OBEX FTP protocol (which allows full filesystem access and is provided by the obexftp package).
  • I don't recommend openobex-apps because it is "the example applications ... they aren't intended for normal use..."

Miscellaneous

  • bluemon - Activate or deactivate programs based on Bluetooth link quality. BlueMon monitors the quality of the link to a Bluetooth device and can start or stop programs when the threshold drops below a certain value. This can be used to perform actions like locking the terminal when you walk away from it.
  • bluez-hcidump - www.bluez.org - allows the monitoring of Bluetooth activity using the hcidump program. Useful for troubleshooting.
  • btscanner - Bluetooth traffic scanner similar to Kismet for wireless

Configuration

The version of Bluetooth you're using can make a big difference. For a list of improvements in successive Bluetooth versions (i.e. faster speed, lower power consumption) see en.wikipedia.org/wiki/Bluetooth#Specifications_and_features. To check which version of Bluetooth you're using, look for the 'LMP version':

  • For the remote device: hcitool info . You should see something like: LMP Version: 2.0 (0x3) LMP Subversion: 0x6cc
  • For the local adapter: # hciconfig -a or hciconfig hci0 version. You should see something like: HCI Ver: 1.1 (0x1) HCI Rev: 0x175 LMP Ver: 1.1 (0x1) LMP Subver: 0x175

GNOME

bluez-gnome provides Desktop → Preferences → Bluetooth Preferences which you use to configure the mode of operation, adapter name and class of device.

Command-line

Bluetooth service manipulation: /etc/init.d/bluetooth start, /etc/init.d/bluetooth stop and /etc/init.d/bluetooth restart

Set the device name in /etc/bluetooth/hcid.conf.

Check whether the Bluetooth adapter is up and running:
hcitool dev
You should see the adapter device name and MAC address.

Troubleshooting

There is a list of supported hardware at www.bluez.org/hardware.html.

If you have trouble connecting look in /var/log/syslog.

Usage

Examine your Bluetooth adapter

Using the command-line

Examine all connected adapters:
hciconfig -a.

Using GNOME

This isn't currently possible with GNOME, it is planned for inclusion in GNOME Bluetooth Manager.

Scan for remote devices

Using the command-line

Get the MAC address and name of available devices:
hcitool scan

Using GNOME

This isn't currently possible with GNOME, it is planned for inclusion in GNOME Bluetooth Manager. However you can get something like this when sending a file where you choose the device to send to.

Ping a remote device

Using the command-line

# l2ping

Using GNOME

This isn't currently possible with GNOME, it is planned for inclusion in GNOME Bluetooth Manager which will be included in the gnome-bluetooth package.

Bond / pair with a device

You can bond with devices such as Bluetooth keyboards or phones.

Using the command-line

Connect to the device:
# hcid connect

Setting a PIN/passkey using the command-line isn't supported so use the GNOME PIN helper, bluez-gnome, whose bonding dialog should appear in the GNOME Notification Area.

Using GNOME

If you have the bluez-gnome package's Bluetooth Applet running in the Notification Area it will prompt you for a PIN when a device tries to connect. You cannot initiate a connection from the Bluetooth Applet. Initiation will be possible with the forthcoming GNOME Bluetooth Manager.

Service discovery of devices around you

Using the command-line

sdptool browse

Using GNOME

This isn't currently possible with GNOME and it doesn't look as though it's planned to be part of the forthcoming GNOME Bluetooth Manager.

Serial connections

Users must be in group 'dialout' to have privileges to use these devices.

Using the command-line

Some features require the Bluetooth device to appear as a traditional serial interface.

Create /dev/rfcomm0 bound to port 3 (the dial-up networking port) on a remote device:
# rfcomm bind 0 3

Check how the rfcomm ports are setup:
rfcomm

Release /dev/rfcomm0:
# rfcomm release 0

Using GNOME

This is planned for inclusion in the forthcoming, as yet unwritten, GNOME Bluetooth Manager.

Transfer files from a device to a computer

Using the command-line

Run obexpushd and it will sit there waiting for files to be sent from the device, which it saves to the current working directory.

Using GNOME

This requires the gnome-bluetooth package. Run Applications → Accessories → Bluetooth File Sharing. This will provide a Notification Area applet. Send a file to the computer, the file will be saved to the desktop and a dialog will appear asking whether you want to open or delete the file. You may have to set the mode of operation by right-clicking on the Bluetooth Notification Area applet and choosing 'Visible and connectable for other devices'.

Transfer files from a computer to a device

Using the command-line

ussp-push @10 (assumes the OBEX File Transfer channel is 10, which you can check with sdptool browse )

Using GNOME

This requires gnome-bluetooth and the updated nautilus-sendto not available in the stock Debian. You right-click on a file and choose 'Send To...' and are able to choose Bluetooth from the 'Send as...' list and the device from the 'Send to...' list.

Internet access through a GPRS or 3G / W-CDMA phone for a computer

See Internet access through a GPRS or 3G / W-CDMA phone from a computer over Bluetooth

Internet access through a computer for a phone

See www.howtoforge.com/bluetooth_pand_debian_etch

Linux Unwired by Roger Weeks, Edd Dumbill, Brian Jepson: www.oreilly.com/catalog/lnxunwired/

Connect a Bluetooth keyboard

Initiate the process from the computer.

Using the command-line

(the Debian documentation mentions loads of patches but i didn't need them to get it working)

# hidd --connect

Though you can provide the pin using the command-line, the documentation warns against it, so use the GNOME PIN helper bluez-gnome. The bonding dialog appears in the GNOME Notification Area, you type the key in there, then type it on the Bluetooth keyboard and press [Enter].

Using GNOME

I Don't see how it can be initiated from the computer using GNOME, without the proposed GNOME Bluetooth Manager which isn't yet available, so initiate it from the keyboard.

Connect a Bluetooth mouse

Initiate this from the computer.

Using the command-line

# hidd --connect

Using GNOME

This isn't currently possible with GNOME, it is planned for inclusion in GNOME Bluetooth Manager which will be included in the gnome-bluetooth package.

Further Information

wiki.debian.org/Bluetooth

Tuesday, October 16, 2007

HOWTO mobile phone, Bluetooth and GNOME

Prologue

I've just successfully installed Bluetooth support and managed to connect my SonyEricsson T630 mobile phone. Since there's a lot of information on the web about Bluetooth under Linux but I couldn't find a Gentoo-specific tutorial I decided to write one. I hope this tutorial is generic enough so that it's useful to people with other hardware, too. Fortunately, Bluetooth virtually works out of the box with Gentoo using stable packages only!

My hardware:

  • i386 system (Athlon)
  • Kernel 2.4.25 (gentoo-sources)
  • Abe UB20 Bluetooth USB dongle
  • SonyEricsson T630
  • GNOME (sorry, haven't tried command line tools or KDE)

What I wanted to do (read: what's covered in this tutorial):

  • Get Linux to recognize my Bluetooth dongle
  • Get Linux to detect my mobile phone
  • Transfer images and sounds to my mobile and back again

What I haven't done yet (and thus isn't covered here):

  • Establish a dial-up connection using Bluetooth and my mobile phone
  • all the other fancy Bluetooth stuff that might be possible (networking and so on)

Okay, let's start, shall we?

Configure kernel for Bluetooth support

Like USB or FireWire you should have the latest kernel drivers for bluetooth. If you're using a previous version your mileage may vary. Also, make sure that USB hotplugging is working as it won't be covered in this tutorial. I assume it's already working for you. Go to /usr/src/linux and make menuconfig to set up Bluetooth. You may compile the features into the kernel but I used modules. Works well and saves you from recompiling the whole kernel. First, go to USB support and make sure that USB Bluetooth support is disabled. (at least for kernel 2.6:) Enable OHCI or UHCI USB support depending on your Hardware (refer to lspci). Then, go to "Bluetooth support" and at least select the following options:

Linux Kernel Configuration: Bluetooth support
 Networking -->
Bluetooth subsystem support -->
L2CAP protocol support
RFCOMM protocol support
[*] RFCOMM TTY support
Bluetooth device drivers --->
HCI USB driver

RFCOMM is not necessary but you may want to enable it, however, if you get the following error message "Can't create device: Operation not permitted" or to prevent it.


Exit, Save your configuration and do make modules modules_install && modules-update.

And don't forget to (if you have compiled bluetooth as a module) modprobe bluetooth.

Emerge the packages

[added by xanda]

If you are using GNOME, you can just do:

USE="bluetooth" emerge -av gnome-bluetooth

as it will pull in all required packages. If you do NOT have GNOME you should install the following packages:

USE="bluetooth" emerge -av bluez-utils openobex obexftp

If you have a broadcom bluetooth device (eg, the Belkin F8T001), you should install bluez-firmware.

Make sure "bluetooth" is in your USE or the openobex wont work

Attach the dongle

There's a lot of Bluetooth hardware available, but as long as it's a USB device, you won't have to do more than connect it to a USB port now. Type dmesg to see if your dongle has been recognized by Linux. It should print something like this:
# dmesg
(...)
hub.c: new USB device 00:07.3-1, assigned address 2
usb.c: USB device 2 (vend/prod 0x400/0x807) is not claimed by any active driver.
usbdevfs: USBDEVFS_CONTROL failed dev 2 rqt 128 rq 6 len 18 ret -6
BlueZ Core ver 2.3 Copyright (C) 2000,2001 Qualcomm Inc
Written 2000,2001 by Maxim Krasnyansky
BlueZ HCI USB driver ver 2.4 Copyright (C) 2000,2001 Qualcomm Inc
Written 2000,2001 by Maxim Krasnyansky
usb.c: registered new driver hci_usb
usbdevfs: USBDEVFS_CONTROL failed dev 2 rqt 128 rq 6 len 18 ret -6
usbdevfs: USBDEVFS_CONTROL failed dev 2 rqt 128 rq 6 len 9 ret -6
usbdevfs: USBDEVFS_CONTROL failed dev 2 rqt 128 rq 6 len 18 ret -6
Look for the "BlueZ" lines. They're telling you that your dongle has been recognized as a USB HCI device. In my case, the kernel modules have been loaded automatically. This might not be the case for everyone. See this site (link busted) on how to edit your /etc/modules.conf if necessary. Keep in mind though, that editing modules.conf directly is not the Gentoo way. Read the man page of modules-update for more.

Start the Bluetooth device

At the console, type "hciconfig" to see the Bluetooth HCI device that has been installed. There should be a hci0 device but it should be marked "DOWN".
# /etc/init.d/bluetooth start
This will start Gentoo's Bluetooth init script. Now, call hciconfig again.
# hciconfig
hci0: Type: USB
BD Address: 08:00:17:1B:42:96 ACL MTU: 339:4 SCO MTU: 60:9
UP RUNNING PSCAN ISCAN
RX bytes:5603 acl:177 sco:0 events:209 errors:0
TX bytes:40682 acl:270 sco:0 commands:30 errors:0
The device is active now as can be seen by "UP RUNNING" in line 3. if the device appears as DOWN, you simply have to run:
# hciconfig hci0 up

If you want to start Bluetooth at boot time, add the script to the default runlevel:

# rc-update add bluetooth default

Let's detect the phone

The "hcitool" command line tool allows you to scan your environment for bluetooth devices. Make sure that your phone is switched on and Bluetooth is enabled. Then type:
# hcitool dev
Devices:
hci0 08:00:17:1B:42:96
That was your local device. Nothing special here.
When scanning for your phone, be sure that your phone is in "discoverable" mode. This is usually found in the Bluetooth menu as "Find Me" or similar.
# hcitool inq
Inquiring ...
00:0E:07:37:7C:BD clock offset: 0x7080 class: 0x520204
# hcitool scan
Scanning ...
00:0E:07:37:7C:BD T630
Yay! That's my cell phone! "T630" is the factory's default name. You can change that on your cell phone of course.

Use GNOME to transfer stuff to your mobile

If you've emerged gnome-bluetooth, the fun has just begun. I'm running the yet masked GNOME 2.6. If you're still running 2.4 things are hopefully the same. First, no need to be root anymore. Log into GNOME as a regular user and open a terminal. Type "gnome-bluetooth-admin" (in GNOME 2.8 type gnome-bluetooth-manager) to launch the GUI version of hcitool.
Click "Scan" and after a while your mobile phone should appear. (see this Screenshot (116 kB))
Next, launch Nautilus and browse to "bluetooth:///". Marvel at the icon depicting your cell phone! You might be tempted to double click on it but this won't work. Instead, you need to drag&drop files onto the icon to transfer them to your mobile phone. In case that "bluetooth:///" doesn't work, try right clicking the file you want to send and select "Send via bluetooth ...".
Background images for the T630 are JPEG images with a size of 128x127 pixels. Use the gimp to create an image yourself or go to sites like http://www.mobile-arsenal.com.ua to get all the backgrounds you need. You're not limited to images. For example, ".thm" files are themes and they can be transfered as well. Midi files (.mid) are used as ring tones. Here are two examples to get started:
Shortly after you've dropped a file onto the icon, your mobile phone should pop up a dialog asking you to accept the incoming file. Do this quickly or Nautilus will time out after a few seconds. If you accept the incoming transfer, the file is uploaded to your phone and stored in the appropriate location of your mobile phone's memory. Go to your pictures folder to see the image or go to "Settings" -> "Display" -> "Themes" to select the new theme.

[added by xanda]

Newer version of gnome-bluetooth (0.8 and above) don't have "gnome-bluetooth-admin" or "gnome-bluetooth-manager" and GNOME (2.10 and above) wont recognize "bluetooth:///" when u type it in your Nautilus. What you should do is first, scan available device(s)

# hcitool scan
Scanning ...
00:0E:07:37:7C:BD T630
and now you can use gnome-obex-send to send your file to your mobile phone
gnome-obex-send --dest 00:0E:07:37:7C:BD /home/xanda/your-file.jpg

Use KDE to browse your mobile phone

Alternatively, you may use KDE to connect to your phone. KDE allows you to browse the contents of your mobile phone. If you don't have konqueror installed, do it
emerge konqueror
and then, emerge kdebluetooth
emerge net-wireless/kdebluetooth
Now, start kbluetoothd. Open a console and type
kbluetoothd
You'll then have a new protocol available in konqueror (bluetooth:///) from where you can browse the contents of your phone. Just open a konqueror window and type bluetooth:/// in the location bar.

6600.com link title

Using your cellphone as remote control for xmms (tested on: Sony Ericsson T630, T610, K700i, K800i, W810)

If you have included RFCOMM protocol support and RFCOMM TTY support into your kernel you are able to configure your cellphone to function as a remote control for xmms. In order to do so, you first need to emerge xmms-btexmms as a plugin.
emerge xmms-btexmms
Now you have to establish the connection between your pc and your cellphone.
You do this by issuing the command rfcomm connect 0 . of course must be replaced by the actual device id of your mobilephone.
rfcomm connect 0 00:0E:07:42:ED:B2
Connected /dev/rfcomm0 to 00:0E:07:42:ED:B2 on channel 1
Press CTRL-C for hangup
In order to find out this device id you have to run hcitool as follows:
hcitool scan
Scanning ...
00:0E:07:42:ED:B2 Momesana

If you did not read the paragraph above yet: read it to find out how to set your PIN. k700i 9988

Now that the connection is established you must start xmms. It must be restarted if it was already running before the connection was made. Every time you reconnect the pc and cellphone you have to also restart xmms in order for it to work properly. Now you have to go to the Options > preferences > General Plugins and configure your BTE Control Plugin. You have to edit the Device Inputline to point to your rfcomm device. On a devfs filesystem it is somewhat like /dev/bluetooth/rfcomm/0. On udev you will find it as /dev/rfcomm0 etc. Feel free to make a symlink to it with a more suitable name such as /dev/phone. This is optional. Remember to then set your device config option in the above mentioned xmms config dialog to /dev/phone.

Now activate the plugin by checking the checkbox at the right bottom of the dialog.

ln -s /dev/rfcomm0 /dev/phone

Now enable your xmms plugin. On a Sony Ericsson cellphone you now can go to connectivity > accessories and select the xmms plugin. To find out about the keys and their function take a look at the config dialog of the plugin under xmms. If you receive an Error like "Can't open RFCOMM device: No such file or directory" as regular user (i.e. not root) and you are using udev, that indicates that your permissions are not correctly set. Since udev creates and deletes device files on demand you have to put the desired permissions in a config file residing under /etc/udev/permission.d. There is probably already a file named "50-udev.permissions". Don't edit this file! Instead create a new file that starts with a lower number, since this will override the settings set in the previously mentioned file. You may for example create a file called "10-udev.permissions" with your favourite editor (I use vi ;) ):

vi /etc/udev/permissions.d/10-udev.permissions

In that file you define the permissions as follows:

rfcomm*:root:dialout:0660

For >udev-056:

# vi /etc/udev/rules.d/10-local.rules

KERNEL="rfcomm[0-9]*", NAME="dialout/%k", GROUP="dialout", MODE="0660"

For >udev-070 the line above should read:

KERNEL=="rfcomm[0-9]*", NAME="%k", GROUP="dialout", MODE="0660"

The above configuration assumes that you belong to the dialout group. If you define a group you do not belong to, you will of course continue getting the error message. The first column rfcomm* means that all device files residing under /dev that start with rfcomm followed by a letter or digit are owned by root (second column -- defining the owner of the file) and belong to the group dialout (third column). The collon functions as a separator. With the above setting root and any member of the dialout group can create /dev/rfcomm, thus being able to use btexmms. You may choose another group and of course you can set other permissions. To enable everybody to use btexmms you may for example change the above permission from 0660 to 0666. Good luck and have fun!

Upload files and manage your SMSes / phonebook (tsemgr)

This program installs with a simple emerge command:

emerge tsemgr -av

It should support connections through serial cable / IR / Bluetooth, but so far I only just tested connection through serial cable. If you use a USB cable, set this in the 'config' pane:

  • Device: /dev/ttyUSB0

I used a SE DSS-20 usb cable (well, desktop stand actually, whatever) and a T630 phone. Unfortunately, the upload files functionality doesn't work for me. (it ends in a segmentation fault) Better luck for you! ;-)

Tsemgr works on bluetooth with a T-610. It also has features to create a "bluetooth remote control" by allowing you to launch predefined commands.

The development of tsemgr has stopped.

Bemused (Only on Nokia Symbian S60 and Nokia S40 with Java Phones)

Works on most, if not all Nokia S60 Phones... and J2ME phones (a lot of Nokia S40 phones) with Bemused J2ME

This is a method for controlling xmms using a Nokia cellphone with Bluetooth and Java. It involves the bemused application being installed on the cellphone and a second part bemusedlinuxserver installed on your computer. To do this, download from bemused.sourceforge.net, unzip and then send bemused.sis (or bemused_full.sis) to your cellphone using either the Gnome or KDE transfer methods described above.

On the computer where your music is stored, type :

emerge bemused

You may need to unmask it.

echo "app-mobilephone/bemused" >> /etc/portage/package.keywords
emerge bemused

After bemused is installed on your computer, simply type bemusedlinuxserver in a console to run the server.
It will automatically start xmms. Now run Bemused on your phone and connect to your computer when it asks you to.

Its config file is located at /etc/bemused.conf Its recommended to modify the mp3dir variable to suit your main mp3 folder.


If youre like me, just modify the config file to disable xmms autostart, and add a small script to run bemusedlinuxserver in the autostart folder to start bemused as soon as your desktop loads...


Phones it has been reported to successfully work on :

  • Nokia 3650
  • Nokia 6021
  • Nokia 6230i
  • Nokia 6280
  • Nokia 6680
  • Nokia 6600
  • Nokia 6670
  • Nokia 6630
  • Nokia 6680
  • Nokia 6820
  • Nokia 7610
  • Nokia 7650
  • Nokia E65
  • Nokia N-Gage
  • Nokia N70
  • Nokia N90
  • Sony Ericsson P900
  • Sony Ericsson K610i
  • Sony Ericsson K800i
  • Sony Erricson w550i
  • Sony Erricson w810i
  • Sony Ericsson w850i
  • Sony Ericsson z550i
  • Siemens SX-1
  • Motorola SLVR L7

(please add your phone to this list if it works satisfactorily on your phone)

Freevo Bluetooth Plugin

Freevo is a "Digital video jukebox (PVR, DVR)". Think MythTV/PlutoHome. There is a plugin avalible for Freevo that lets you use your cellphone as a remote. This uses RFCOMM and an AT/T (Hayes) command that sends all keypresses over the line to your computer. Most Symbian OS phones have this feature. Reported to work with Sony Ericsson T610, T65, Motorola E398 and a few Siemens phones. Download the plugin from the Freevo page (Downloads -> Plugins). Complete instructions is included with the plugin! Also, if you got a Nokia Series 60 phone, check out PlutoHome, their cellphone remote is cool.

Sending SMS with your Mobile Phone

First of all, you have to emerge the Gnome Phone Manager

emerge gnome-phone-manager

Start it (as a normal user) and go to "Preferences -> Connection". Choose bluetooth and click on "Choose" to select a mobile phone. Make sure your mobile is in "Discoverable" mode and click on scan. gnome-phone-manager should now find your mobile. Select it and click "OK". You mobile will now ask for a code (PIN) - simply type any code (eg. 1234). Just one second later, gnome-phone-manager will ask you for a code - type in the same one. Now your mobile is connected. Maybe it's a good idea to set "Automatically retry connections". If you connection is not stable (you can see that by looking on the symbol in your notification area), restart gnome-phone-manager (I needed to do so). After reconnecting, you should be able to send SMS, by simply right-clicking on the icon in the notification area and selecting "Send Message".

I tested this with a Motorola RAZR and a Samsung X11. Sending worked, however SMS were only received on the mobile phone (I wouldn't want to receive them on the notebook anyway...).

Please report here, if it worked with your mobile-phone / PC / notebook:

Notebooks:

  • Samsung X11
  • HP dv6135nr with Belkin USB Bluetooth dongle
  • Acer Travelmate 8106lmi
  • HP 6910p

Mobile Phones:

  • Motorola RAZR
  • Samsung SGH-T509
  • Samsung SGH-X680
  • Samsung SGH-X820
  • Sony Ericsson T630
  • Sony Ericsson T610
  • Sony Ericsson Z520a
  • Sony Ericsson K750i
  • Nokia 6300

Resources used and thanks to

That's it! Here's another screenshot showing how smoothly everything works: Screenshot (142 kB)
I hope you've found this tutorial useful, even if you don't own a USB dongle and a T630. However, the process should be the same for other modern mobile phones. Just look for the right kind of images and themes suitable for your phone. Here are some links to pages that were useful to me: