Tuesday, March 3, 2009

Howto install a Debian Lenny

This tutorial shows how you can set up a Debian Lenny desktop that is a full-fledged replacement for a Windows desktop, i.e. that has all the software that people need to do the things they do on their Windows desktops. The advantages are clear: you get a secure system without DRM restrictions that works even on old hardware, and the best thing is: all software comes free of charge.

I want to say first that this is not the only way of setting up such a system. There are many ways of achieving this goal but this is the way I take. I do not issue any guarantee that this will work for you!

Preliminary Note

To fully replace a Windows desktop, I want the Debian Lenny desktop to have the following software installed:

Graphics:

  • The GIMP - free software replacement for Adobe Photoshop
  • F-Spot - full-featured personal photo management application for the GNOME desktop
  • Google Picasa - application for organizing and editing digital photos

Internet:

  • Firefox/Iceweasel
  • Opera
  • Flash Player 10
  • FileZilla - multithreaded FTP client
  • Thunderbird/Icedove - email and news client
  • Evolution - combines e-mail, calendar, address book, and task list management functions
  • aMule - P2P file sharing application
  • Transmission BitTorrent Client - BitTorrent client
  • Azureus/Vuze - Java Bittorrent client
  • Pidgin - multi-platform instant messaging client
  • Skype
  • Google Earth
  • Xchat IRC - IRC client

Office:

  • OpenOffice Writer - replacement for Microsoft Word
  • OpenOffice Calc - replacement for Microsoft Excel
  • Adobe Reader
  • GnuCash - double-entry book-keeping personal finance system, similar to Quicken
  • Scribus - open source desktop publishing (DTP) application

Sound & Video:

  • Amarok - audio player
  • Audacity - free, open source, cross platform digital audio editor
  • Banshee - audio player, can encode/decode various formats and synchronize music with Apple iPods
  • MPlayer - media player (video/audio), supports WMA
  • Rhythmbox Music Player - audio player, similar to Apple's iTunes, with support for iPods
  • gtkPod - software similar to Apple's iTunes, supports iPod, iPod nano, iPod shuffle, iPod photo, and iPod mini
  • XMMS - audio player similar to Winamp
  • dvd::rip - full featured DVD copy program
  • Kino - free digital video editor
  • Sound Juicer CD Extractor - CD ripping tool, supports various audio codecs
  • VLC Media Player - media player (video/audio)
  • Real Player
  • Totem - media player (video/audio)
  • Xine - media player, supports various formats; can play DVDs
  • Brasero - CD/DVD burning program
  • K3B - CD/DVD burning program
  • Multimedia Codecs

Programming:

  • KompoZer - WYSIWYG HTML editor, similar to Macromedia Dreamweaver, but not as feature-rich (yet)
  • Bluefish - text editor, suitable for many programming and markup languages
  • Quanta Plus - web development environment, including a WYSIWYG editor

Other:

  • VMware Server - lets you run your old Windows desktop as a virtual machine under your Linux desktop, so you don't have to entirely abandon Windows
  • TrueType fonts
  • Java
  • Read-/Write support for NTFS partitions

Lots of our desired applications are available in the Debian repositories.

As you might have noticed, a few applications are redundant, for example there are two CD/DVD burning applications in my list (Brasero, K3B). If you know which one you like best, you obviously don't need to install the other applications, however if you like choice, then of course you can install both. The same goes for music players like Amarok, Banshee, Rhythmbox, XMMS or browsers (Firefox/Iceweasel, Opera).

I will use the username falko in this tutorial, and I will download all necessary files to falko's desktop which is equivalent to the directory /home/falko/Desktop. If you use another username (which you most probably do ;-)), please replace falko with your own username. So when I use a command like

cd /home/falko/Desktop

you must replace falko.

Installing The Base System

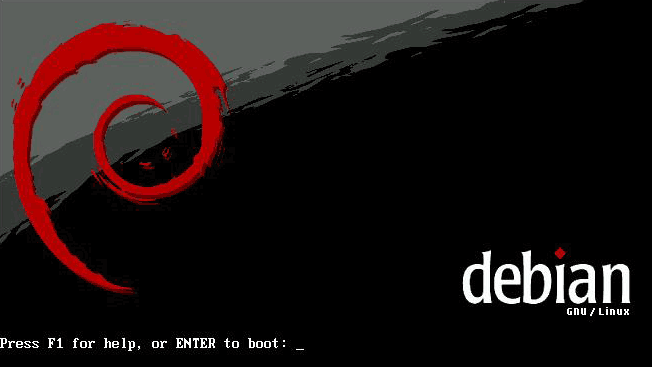
Download the Debian Lenny netinstall iso image (available here: http://cdimage.debian.org/debian-cd/5.0.0/i386/iso-cd/debian-500-i386-netinst.iso (i386) or http://cdimage.debian.org/debian-cd/5.0.0/amd64/iso-cd/debian-500-amd64-netinst.iso (x86_64)) , burn it onto a CD, and boot your computer from it. Select Graphical install:

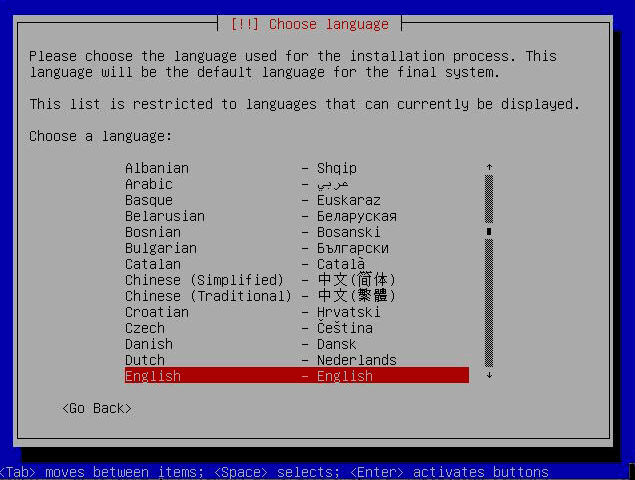
Choose your language:

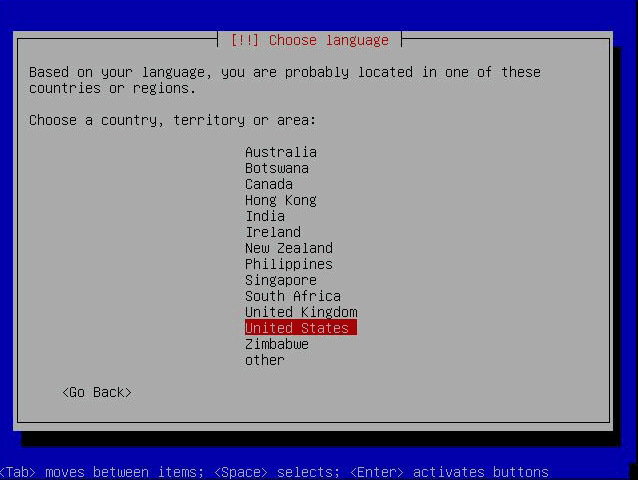
Then select your location:

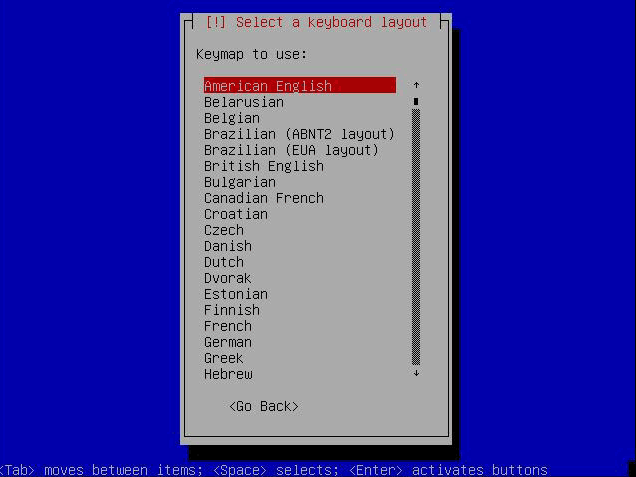
Choose a keyboard layout:

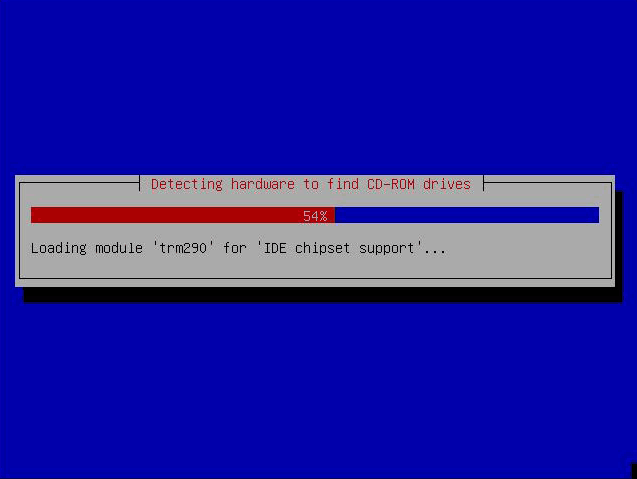
The installer checks the installation CD, your hardware, and configures the network with DHCP if there is a DHCP server in the network:

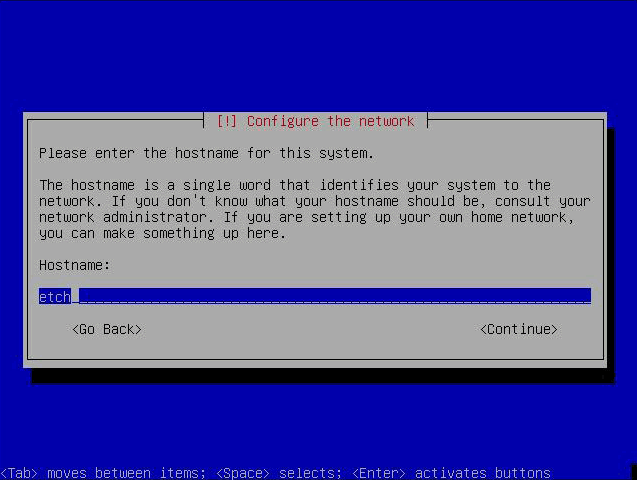
Since this is a desktop, you can accept the default hostname...

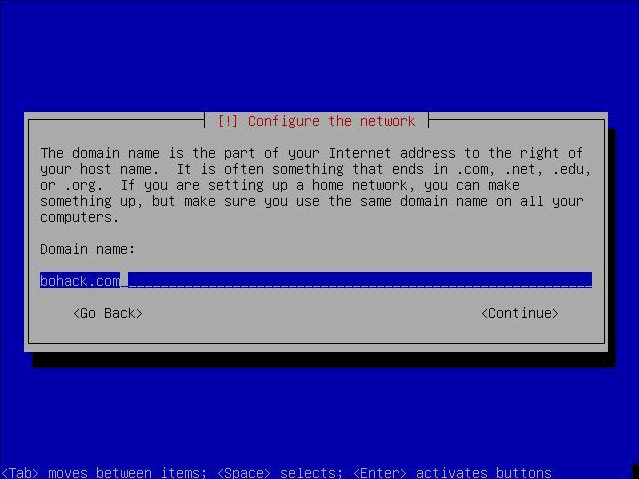
... and domain:

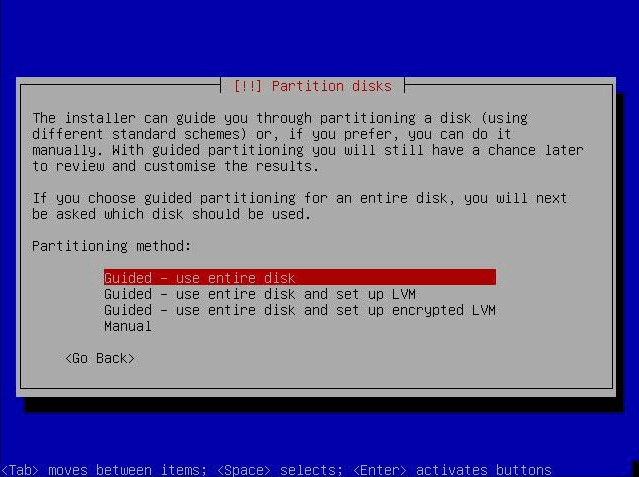
Now you have to partition your hard disk. For simplicity's sake I will create one big partition (with the mount point /) and a little swap partition so I select Guided - use entire disk (of course, the partitioning is totally up to you - if you like, you can create more than just one big partition, and you can also use LVM):

Select the disk that you want to partition:

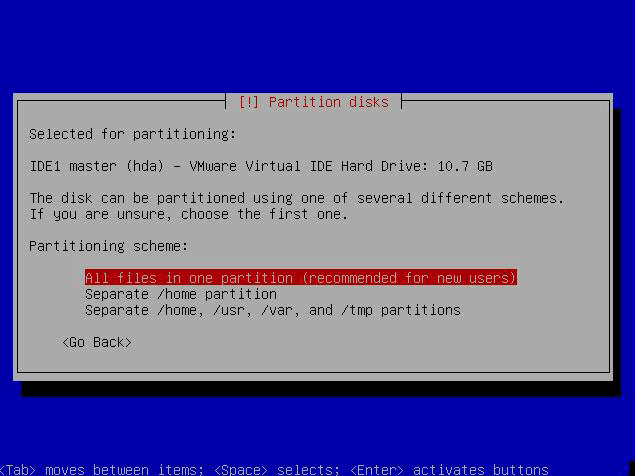
Then select the partitioning scheme. As mentioned before, I select All files in one partition (recommended for new users) for simplicity's sake - it's up to your likings what you choose here:

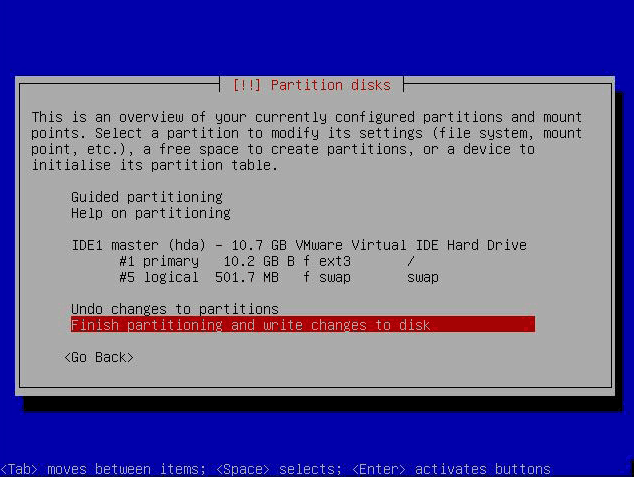
When you're finished, select Finish partitioning and write changes to disk:

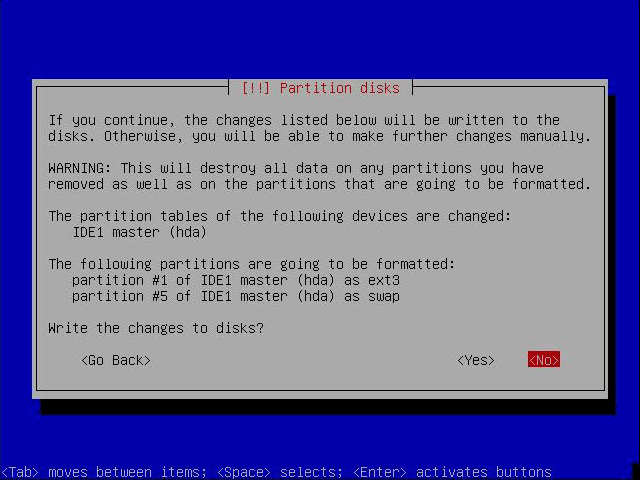
Select Yes when you're asked Write changes to disks?:

Afterwards, your new partitions are created and formatted:

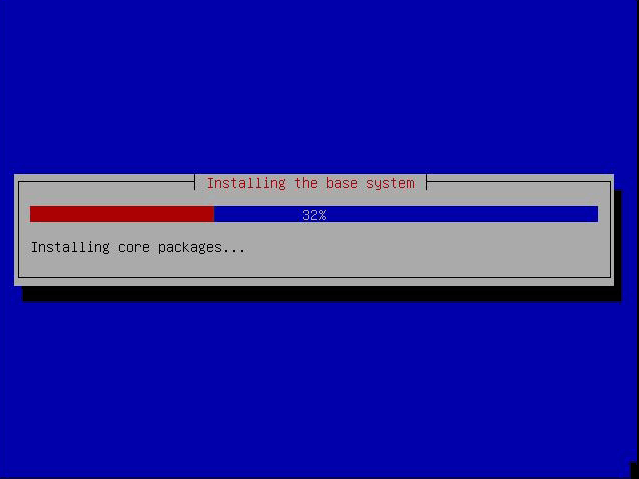
Now the base system is installed:

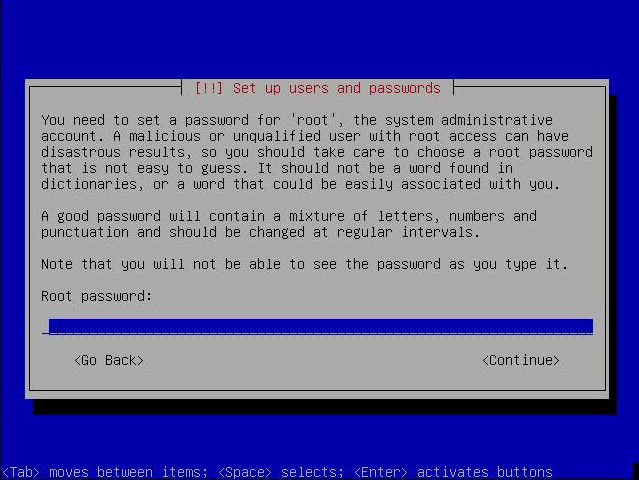
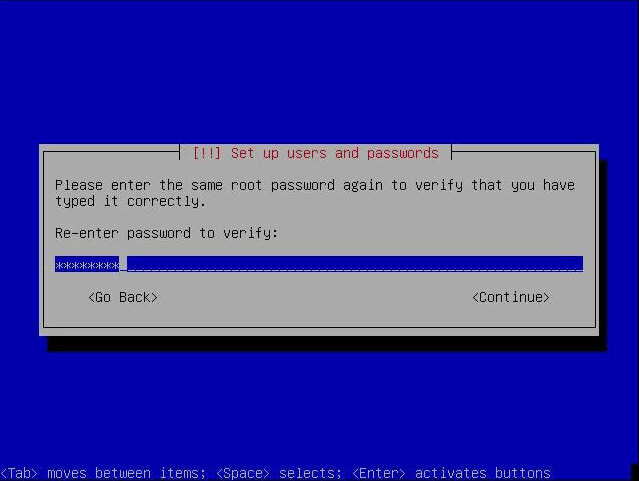
Afterwards, give the root user a password:

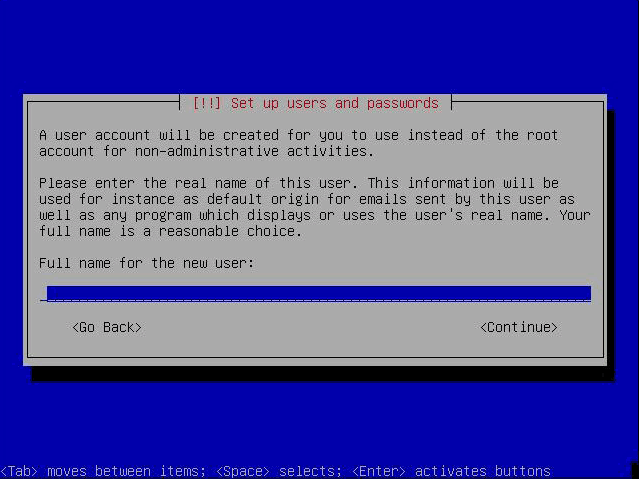
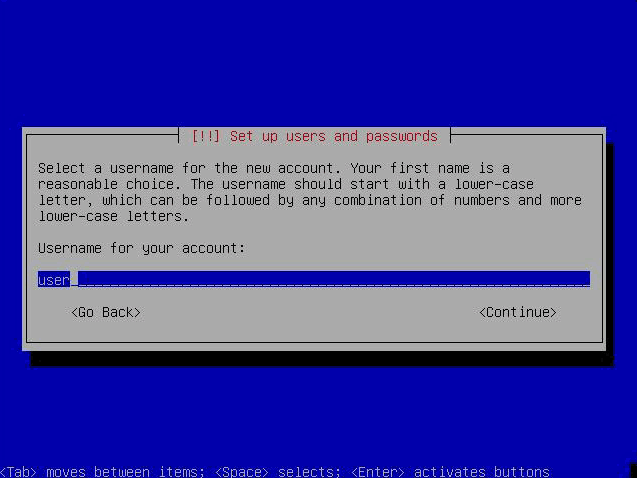
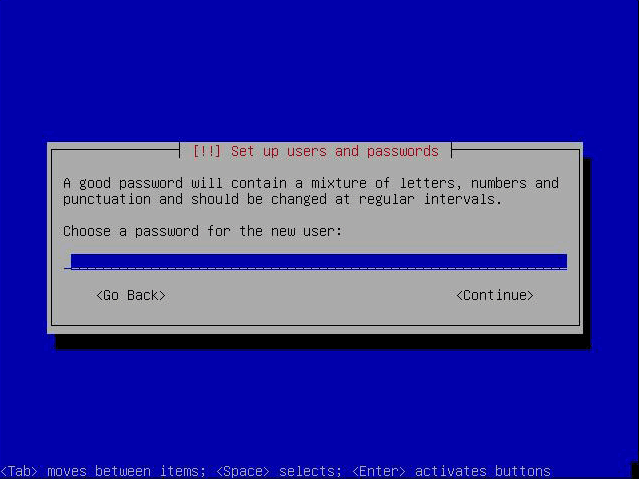
Create a normal user account:

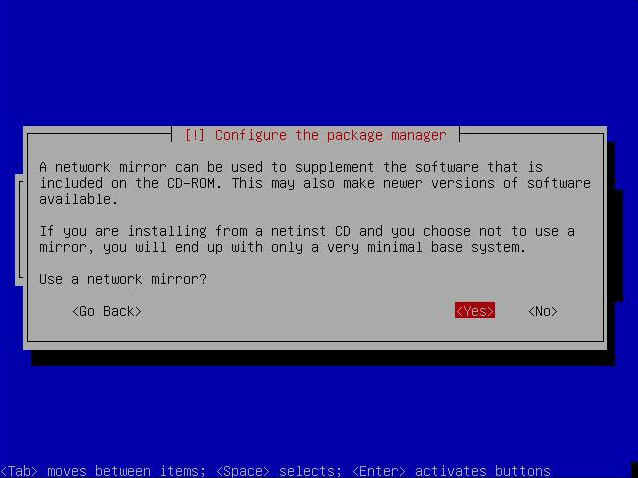
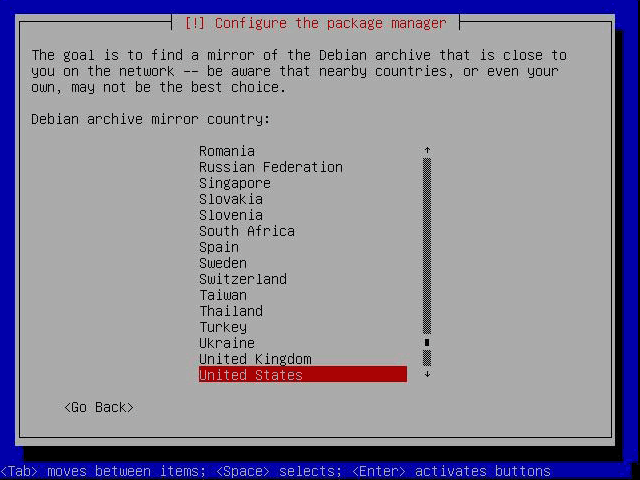
Next you must configure apt. Because you are using the Debian Lenny Netinstall CD which contains only a minimal set of packages, you must use a network mirror. Select the country where the network mirror that you want to use is located (usually this is the country where your Debian Lenny system is located):

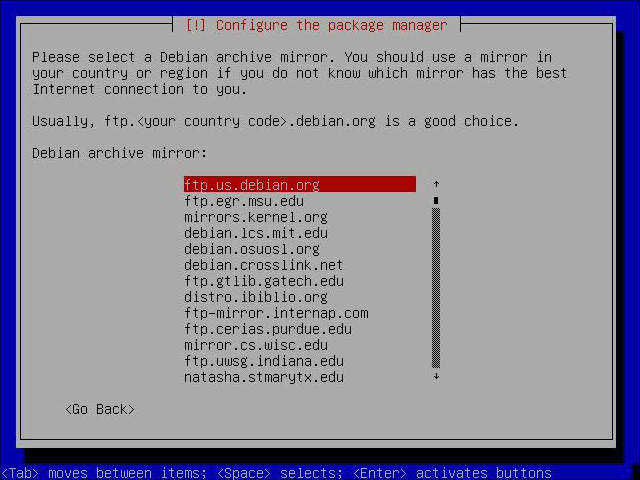
Then select the mirror you want to use (e.g. ftp2.de.debian.org):

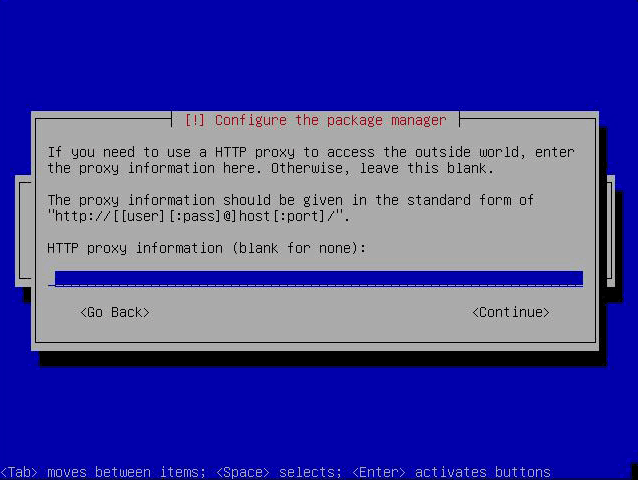
Unless you use an HTTP proxy, leave the following field empty and hit Continue:

Apt is now updating its packages database:

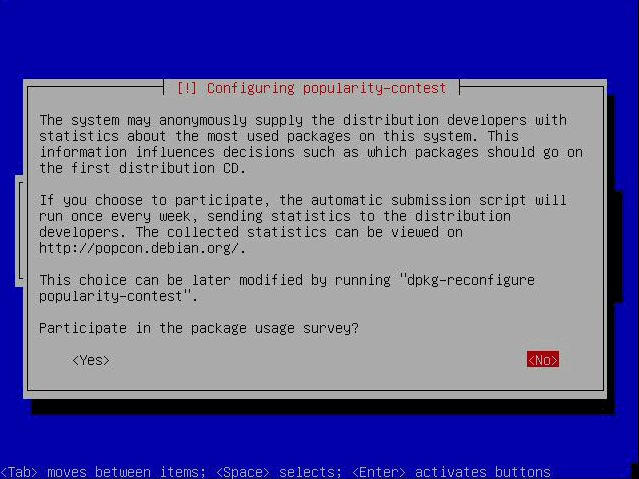
You can skip the package usage survey by selecting No:

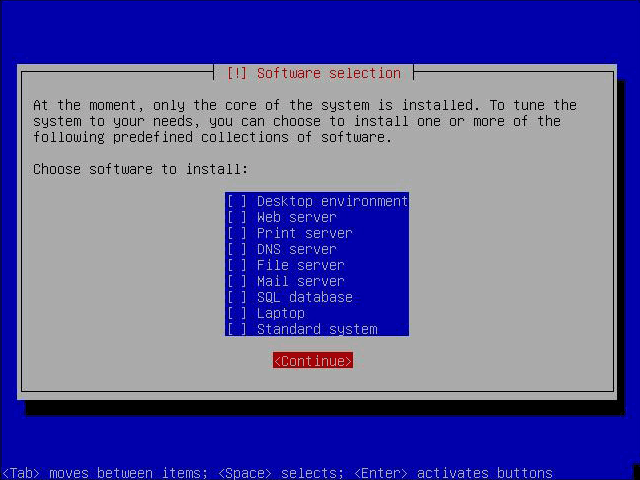
Select Desktop environment and Standard system on the Software selection screen and hit Continue:

The required packages are downloaded and installed on the system:

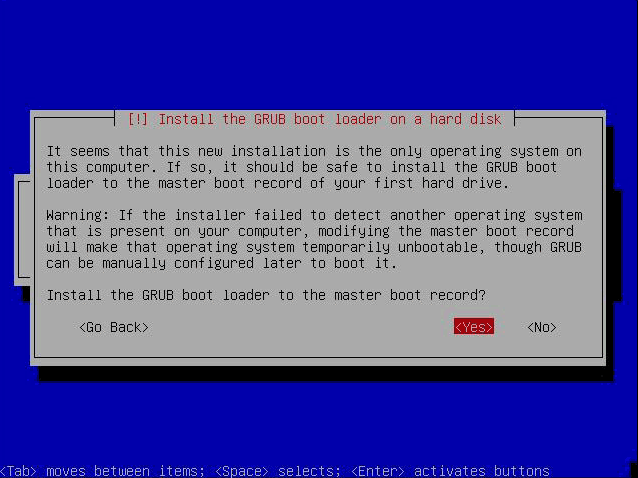
When you're asked Install the GRUB boot loader to the master boot record, select Yes:

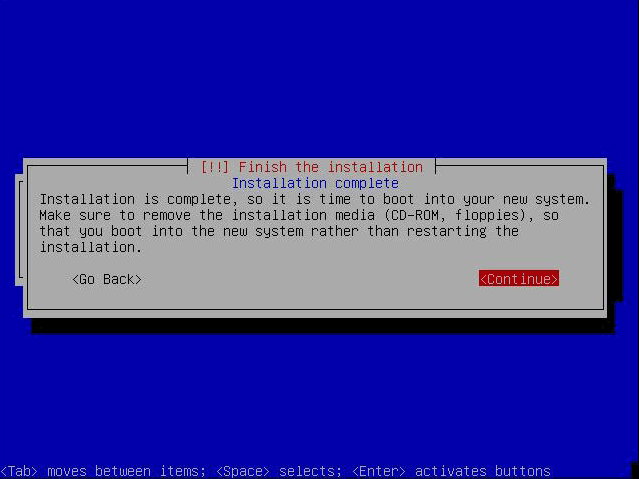
The base system installation is now finished. Remove the Debian Lenny Netinstall CD from the CD drive and hit Continue to reboot the system:

After the reboot, log in to the desktop with the username and password you provided during the installation:

This is how your new desktop looks:

Now the base system is ready to be used.

Monday, March 2, 2009

Debian Lenny: Howto use iwl-wifi (Intel Wireless WiFi Link driver) with an iwl3945 or iwl4965!

Wireless setup on Debian Lenny

This page describes how to use iwl-wifi (Intel Wireless WiFi Link driver) with an iwl3945 or iwl4965.

Introduction

The iwl-wifi drivers are open-source drivers supported by Intel, replacing the older Intel drivers ipw3945 which needed some userspace daemon (see ).

Supported hardware :

  • Intel 3945 and 4965 : since Etch 2.6.23 and later kernels (Etch's kernel 2.6.18 had ipw3945).

  • Intel 5100 and 5300 : see page iwlagn.

Installation

  • Install 2.6.24 (or later) kernel, available in :
  • Install Firmware. (You will need to add non-free repository to /etc/apt/source.list)
     aptitude install firmware-iwlwifi

Loading the iwl3945 / iwl4965 modules

  • The module should be loaded automatically by udev when the system starts.
  • Most laptops have a radio kill switch (or a function key combination) to physically disable the radio (when inside an airplane for example). Make sure to enable the radio.
  • If the module isn't loaded automatically, issue this command:

    iwl4965 :

    modprobe iwl4965

    iwl3945 :

    modprobe iwl3945

Using iwlWifi

Gnome Network Manager

  • Gnome- Double click on Network Connection (If you don't have an icon click on add to panel, then Select "Network Monitor" and click add)
  • Name: Wlan0
  • Click on configure
  • Select Wireless connection
  • Properties
  • Pick a network, add a password, select dhcp and click ok
  • You should be connected.
  • If the user as who you are currently logged in does not belong to group netdev add yourself to it:

adduser foo-user netdev

Alternatively,

  • Those who prefer using ifup/ifdown from the command line, I used the following stanza in /etc/network/interfaces/:

    iface wlan0 inet dhcp
    pre-up ip link set wlan0 up
    wireless_essid MakeTeaNotWar

Note the magic pre-up line, which I needed to make the card associate with the access point. As a bonus, with this stanza the interface works after an S3 resume (i.e. suspend/resume to RAM)!

Interfaces

Once the module is loaded, ip a should show two interfaces (wlan0 is the "main" one).

  • 3: wmaster0:  mtu 1500 qdisc ieee80211 qlen 1000
    link/ieee802.11 00:13:e8:70:69:fb brd ff:ff:ff:ff:ff:ff
    4: wlan0: mtu 1500 qdisc pfifo_fast qlen 1000
    link/ether 00:13:e8:70:69:fb brd ff:ff:ff:ff:ff:ff

Switching from ipw3945 to iwl3945

  • Install as explained above.
  • Check for the line generated by udev for ipw3945 in /etc/udev/rules.d/z25_persistent-net.rules. If it is there, remove it (more explanation in "Common problems and errors" below).
  • Optionally, change the configuration in /etc/network/interfaces by replacing eth2 (or whatever the old name for wireless interface is) with wlan0.
  • Reboot into the new kernel.
  • Verify that wireless networking is functional. If you can connect, but you cannot send/receive anything you might want to check your firewall configuration. For example, if you have configured your firewall using shorewall, you have to change all occurrences of eth2 in the files in /etc/shorewall with wlan0.
  • Remove the ipw3945-modules-* and ipw3945d packages.

Common problems and errors

Interfaces is named "wlan0_rename" (sysfs_create_symlink failed)

Another symptom is that Network-manager don't handle the wireless card.

/var/log/syslog may show :

  • kernel: iwl3945: Intel(R) PRO/Wireless 3945ABG/BG Network Connection driver for Linux, 0.1.15ks
    kernel: iwl3945: Copyright(c) 2003-2007 Intel Corporation
    kernel: ACPI: PCI Interrupt 0000:03:00.0[A] -> GSI 17 (level, low) -> IRQ 22
    kernel: PCI: Setting latency timer of device 0000:03:00.0 to 64
    kernel: iwl3945: Detected Intel PRO/Wireless 3945ABG Network Connection
    kernel: iwl3945: Tunable channels: 13 802.11bg, 23 802.11a channels
    kernel: wmaster0: Selected rate control algorithm 'iwl-3945-rs'
    kernel: net eth2: device_rename: sysfs_create_symlink failed (-17)
    kernel: udev: renamed network interface wmaster0 to eth2
    kernel: net wlan0_rename: device_rename: sysfs_create_symlink failed (-17)
  • This may occur if you had used ipw3945 module before.

Resolution

in /etc/udev/rules.d/z25_persistent-net.rules remove the line like

  • # PCI device 0x8086:0x4227 (ipw3945)
    SUBSYSTEM=="net", DRIVERS=="?*", ATTRS{address}=="00:13:02:4c:12:12", NAME="eth2"

then remove the module and re-insert it.

  • rmmod iwl3945
    modprobe iwl3945

in /etc/udev/rules.d/z25_persistent-net.rules you should now have a line like :

  • # PCI device 0x8086:0x4227 (iwl3945)
    SUBSYSTEM=="net", DRIVERS=="?*", ATTR{address}=="00:13:02:4c:12:12", ATTR{type}=="1", NAME="wlan0"

Card does not associate to the access point

If the card accepts the essid, for example, by doing :

  • iwconfig wlan0 essid YourESSID

but does not associate to the access point even when no encryption is needed: The driver seems to need the interface to be in the up state when it gets the essid. So first do

  • ip link set wlan0 up

then set the essid as before.

If the card still does not associate to the access point even with essid and encryption keys set, try

  • iwconfig wlan0 ap any

If you configured you card in /etc/network/interfaces and you cannot associate to you access point, you might want to try different values for wpa-scan-ssid and wpa-ap-scan. The former accepts either 0 or 1, the latter 0, 1 or 2. Setting wpa-scan-ssid to 0 and wpa-ap-scan to 1 is a good first bet, but make sure to try other configurations if it doesn't work.

You may also find that setting a high retry value helps with WEP enabled access points that appear to work or that work with other cards but send repeated disassociates. Try something like this and insert an arbitrary retry value. It may take a few tries with dhclient to get an IP:

  • iwconfig wlan0 retry 

Can't see any network

If networkmanager seems to detect the card, but can't "see" any network, it might be because the firmware isn't installed. make sure you have installed the firmware, then unloaded and reloaded the module.

  • ACPI: PCI Interrupt 0000:03:00.0[A] -> GSI 17 (level, low) -> IRQ 17
    kernel: PM: Writing back config space on device 0000:03:00.0 at offset 1 (was 100102, writing 40100106)
    kernel: firmware: requesting iwlwifi-4965-1.ucode
    kernel: iwl4965: iwlwifi-4965-1.ucode firmware file req failed: Reason -2
    kernel: iwl4965: Could not read microcode: -2

You are able to associate, but you cannot send nor receive anything on the interface

If this happens, your firewall might be blocking your traffic. This will mostly happen if you switch from ipw3945/ipw4945 to iwlwifi because the name of the interface changes from eth2 to wlan0. Check your firewall configuration, e.g. if you are using shorewall check the files in /etc/shorewall/ and change the name of the interface to wlan0.

Supported devices

The page HowToIdentifyADevice/PCI explains how to identify a PCI device.

The following list is based on the alias fields of modinfo iwl3945 and modinfo iwl4965 on Lenny.

  • PCI: 8086:4222 Intel Corporation PRO/Wireless 3945ABG [Golan] Network Connection
    PCI: 8086:4227 Intel Corporation PRO/Wireless 3945ABG [Golan] Network Connection

    PCI: 8086:4229 Intel Corporation PRO/Wireless 4965 AG or AGN [Kedron] Network Connection
    PCI: 8086:4230 Intel Corporation PRO/Wireless 4965 AG or AGN [Kedron] Network Connection

See also


  • 1 ipw3945-vs-iwl3945: The Intel code in ipw3945 implements a number of non-free algorithms which are not realized in iwl3945, including automatic calibration of the radio power based on temperature variations, and dynamic tuning of the radio sensitivity based on received signal strength. These may extend the operating range of the adapter, improve throughput in various environmental conditions, and reduce power consumption, but they are kept secret by Intel.

Sunday, March 1, 2009

Debian 4.0 Etch and upgrade to Debian 5.0/Lenny Installation Walkthrough!

In this tutorial I will show people who are willing to switch to Linux how they can set up a Linux desktop (Debian Etch in this article) that fully replaces their Windows desktop, i.e. that has all software that people need to do the things they do on their Windows desktops. The advantages are clear: you get a secure system without DRM restrictions that runs also on older hardware, and the best thing is: all software comes free of charge.

I want to say first that this is not the only way of setting up such a system. There are many ways of achieving this goal but this is the way I take. I do not issue any guarantee that this will work for you!

1 Preliminary Note

To fully replace a Windows desktop, I want the Debian Etch desktop to have the following software installed:

Graphics:

  • The GIMP - free software replacement for Adobe Photoshop
  • F-Spot - full-featured personal photo management application for the GNOME desktop
  • Google Picasa - application for organizing and editing digital photos

Internet:

  • Iceweasel (Debian's name for Firefox)
  • Opera
  • Flash Player 9
  • gFTP - multithreaded FTP client
  • Icedove (Debian's name for Thunderbird) - email and news client
  • Evolution - combines e-mail, calendar, address book, and task list management functions
  • aMule - P2P file sharing application
  • Bittorrent client
  • Azureus - Java Bittorrent client
  • Gaim - multi-platform instant messaging client
  • Skype
  • Google Earth
  • Xchat IRC - IRC client

Office:

  • OpenOffice Writer - replacement for Microsoft Word
  • OpenOffice Calc - replacement for Microsoft Excel
  • Adobe Reader
  • GnuCash - double-entry book-keeping personal finance system, similar to Quicken
  • Scribus - open source desktop publishing (DTP) application

Sound & Video:

  • Amarok - audio player
  • Audacity - free, open source, cross platform digital audio editor
  • Banshee - audio player, can encode/decode various formats and synchronize music with Apple iPods
  • MPlayer - media player (video/audio), supports WMA
  • Rhythmbox Music Player - audio player, similar to Apple's iTunes, with support for iPods
  • gtkPod - software similar to Apple's iTunes, supports iPod, iPod nano, iPod shuffle, iPod photo, and iPod mini
  • XMMS - audio player similar to Winamp
  • dvd::rip - full featured DVD copy program
  • Kino - free digital video editor
  • Sound Juicer CD Extractor - CD ripping tool, supports various audio codecs
  • VLC Media Player - media player (video/audio)
  • Real Player
  • Totem - media player (video/audio)
  • Xine - media player, supports various formats; can play DVDs
  • GnomeBaker - CD/DVD burning program
  • K3B - CD/DVD burning program
  • Multimedia-Codecs

Programming:

  • Nvu- WYSIWYG HTML editor, similar to Macromedia Dreamweaver, but not as feature-rich (yet)
  • Bluefish - text editor, suitable for many programming and markup languages
  • Quanta Plus - web development environment, including a WYSIWYG editor

Other:

  • VMware Server - lets you run your old Windows desktop as a virtual machine under your Linux desktop, so you don't have to entirely abandon Windows
  • TrueType fonts
  • Java
  • Read/Write support for NTFS partitions

Debian automatically installs the GNOME desktop.

Lots of our desired applications are available in the Debian repositories, and some of these applications have been contributed by the Debian community. The rest (except for VMware Server) can be obtained by using Automatix. This makes it very easy to achieve our goal.

  1. Download the latest current build from the Debian website http://www.debian.org/distrib/. You’ll only need to download and burn the first ISO for CD1, since all the other CDs contain packages that can be downloaded via the ‘apt-get’ command.
  2. Insert the CD and set your BIOS or ‘first boot’ menu to boot from CD. As the CD spins up you will be brought to a prompt with the Debian logo. Debian Etch defaults to install the Linux 2.6 kernel so just hit enter.
  3. Debian Boot Screen
  4. The ‘Choose language’ screen will appear, select ‘English’ or your preferred language.
  5. Choose the language Dialog
  6. The ‘Choose country or region’ screen will appear, select ‘United States’ or your preferred country.
  7. Choose Country or Region Dialog
  8. The ‘Select a keyboard layout’ screen will appear, select ‘American English’ or your preferred layout.
  9. Select the Keyboard Layout Dialog
  10. The pre-installer will start to scan your hardware, scan the packages available on the CDROM, load the components of the Debian installer, then detect and configure the network with DHCP if detected.
  11. Pre-Installer Dialog
  12. You be prompted at the ‘Configure the network’ screen, were you will be asked to select a hostname for your system.
  13. Configure the Hostname Dialog
  14. Then you’ll be prompted with the ‘Domain name’ prompt, were you will select your domain name for your system.
  15. Domain Name Dialog
  16. The installer will detect all disks and start the partition utility. It is preferable to select the ‘Erase entire disk’.
  17. Auto Partition Dialog
  18. The next prompt will ask you for a partitioning scheme, again it is preferable to select the default of ‘All files in one partition’.
  19. Partitioning Scheme Dialog
  20. You will then have a chance to confirm your selection and ‘Finish partitioning and write the changes to disk’.
  21. Confirm Partitioning Scheme
  22. You’ll be prompted again to write the changes, select ‘Yes’ the default is ‘No’.
  23. Final Prompt to Write Changes
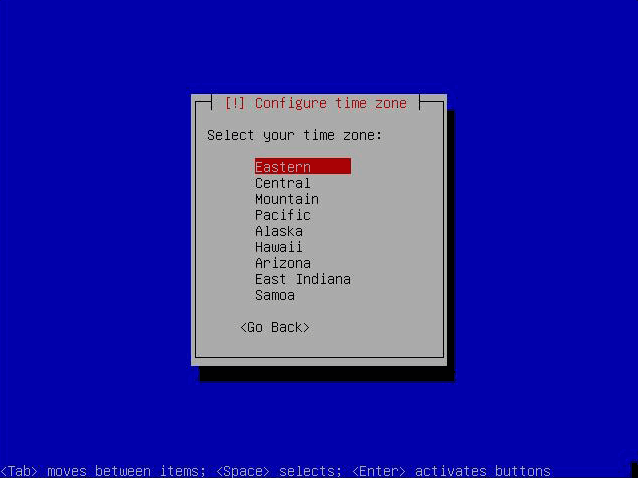
  24. The installer will ask for your time zone, enter the desired time zone.
  25. Time Zone Configuration Dialog
  26. The installer will ask for the root’s password (privileged user account).
  27. Root Password Dialog
  28. You will need to type the password again for confirmation.
  29. Root Password Confirmation
  30. You will also be required to create an initial user (non-privileged user account) account.
  31. Non-Root Account Dialog
  32. You will need to supply a login name for the account.
  33. Login Name Dialog
  34. Set the password for this user and confirm it like the previous account.
  35. Non-Root Password Dialog
  36. The system installer will begin installing the entire system now.
  37. System Installation Dialog
  38. The package manager will now require configuration, select ‘Yes’ for a mirror.
  39. Select a Mirror Dialog
  40. Choose ‘United States’ for the mirror’s country or your country.
  41. Mirror Country Dialog
  42. Choose ‘ftp.us.debian.org’ or the first mirror that appears for you prior selection.
  43. Select Mirror Dialog
  44. Select ‘Enter’ if you are not using a proxy.
  45. Select Proxy Dialog
  46. The developers ask that you participate in a feedback survey, for this how-to we will answer ‘No’.
  47. Feedback Survey Dialog
  48. Unselect all software using the spacebar and arrow keys and select ‘Continue’.
  49. Select Software to Install Dialog
  50. Answer ‘Yes’ to the Grub loader screen, this will install the boot manager of Grub on the system; this is used for emergency purposes.
  51. Grub Install Dialog
  52. Finish the install by selecting ’Continue’.
  53. Finish the Install Dialog
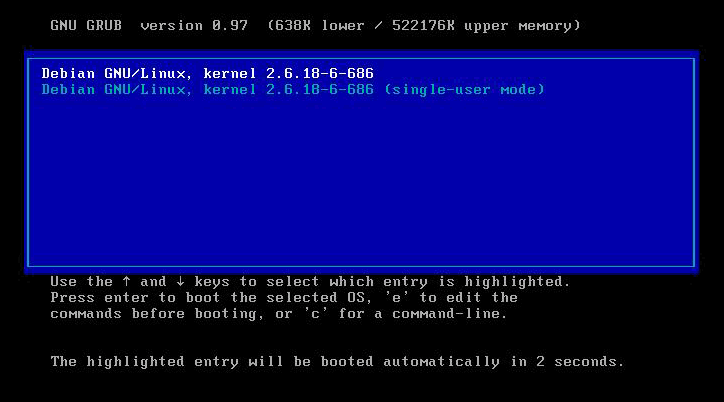
  54. You will reboot and see the Grub boot loader.
  55. Grub Boot Screen
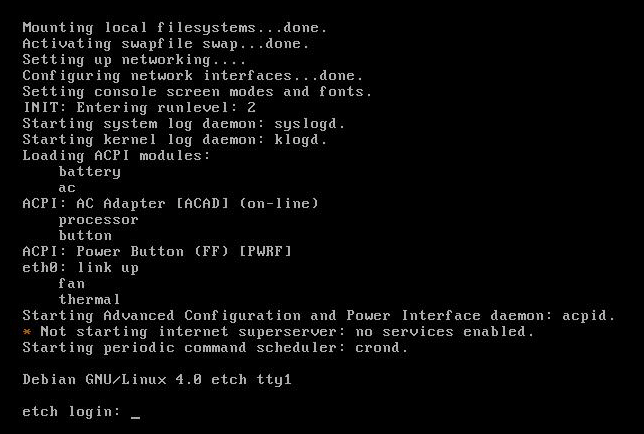
  56. You can now login as ‘root’ with the password you supplied for ‘root’.
  57. Initial Login
    Now that we have an installed and running system we need to tweak a few settings. The network was installed and DHCP had been automatically configured, however since this will be a server DHCP is not the right choice; we will need to manually configure an IP address.

  58. Edit ‘/etc/network/interfaces’ by typing:
    emacs -w /etc/network/interfaces# This file describes the network interfaces available on your system
    # and how to activate them. For more information, see interfaces(5).

    # The loopback network interface
    auto lo
    iface lo inet loopback

    # The primary network interface
    #auto eth0
    #iface eth0 inet dhcp

    auto eth0
    iface eth0 inet static
    address 192.168.1.2
    netmask 255.255.255.0
    network 192.168.1.0
    broadcast 192.168.1.255
    gateway 192.168.1.1

  59. Set the resolver for proper DNS servers.
    emacs -w /etc/resolv.confsearch foo.com
    nameserver 192.168.1.3
    nameserver 192.168.1.4
  60. Next you will need to restart the network component.
    /etc/init.d/networking restart
  61. Add your new static IP to the hosts table.
    emacs -w /etc/hosts

    127.0.0.1 localhost.localdomain localhost debian

    192.168.1.2 debian.foo.com debian

    # The following lines are desirable for IPv6 capable hosts
    ::1 ip6-localhost ip6-loopback
    fe00::0 ip6-localnet
    ff00::0 ip6-mcastprefix
    ff02::1 ip6-allnodes
    ff02::2 ip6-allrouters
    ff02::3 ip6-allhosts

  62. Set the system’s hostname.echo server1.example.com > /etc/hostname
    /bin/hostname -F /etc/hostname
  63. Install some needed software packages and services.apt-get install wget bzip2 rdate unzip zip ncftp nmap lynx fileutils dnsutils
    apt-get install tcpdump less make tftp rdate file gcc g++ ssh
  64. Sync the time with an atomic clock.crontab -e

    # update time with time.nist.gov
    0 3,9,15,21 * * * /usr/sbin/rdate time.nist.gov | logger -t NTP

  65. Set up the ‘bashrc’ file.nano -w /root/.bashrc

    # ~/.bashrc: executed by bash(1) for non-login shells.

    export PS1=’\h:\w\$ ‘
    umask 022

    # You may uncomment the following lines if you want `ls’ to be colorized:
    export LS_OPTIONS=’–color=auto -h’
    eval “`dircolors`”
    alias ls=’ls $LS_OPTIONS’
    alias ll=’ls $LS_OPTIONS -l’
    alias l=’ls $LS_OPTIONS -lA’

    # Some more alias to avoid making mistakes:
    alias rm=’rm -i’
    alias cp=’cp -i’
    alias mv=’mv -i’

    # Bohack’s stuff
    alias nano=’nano -w -K’
    alias pico=’nano -w -K’
    alias ptree=’ps axf’

    PS1=’\[\033[36;1m\w \[\033[35;1m\h \[\033[0m\$ ‘
    export PS1
    export GREP_OPTIONS=”–color=auto”
    TERM=xterm-color
    export TERM
    cd /

Done! You now have a minimal install of Debian as a clean install. Don’t forget to do an ‘apt-get update’ and an ‘apt-get upgrade’, to install any major/minor updates.

Howto Upgrade a Debian 4.0 ("Etch") to Debian 5.0 ("Lenny"):


This article shows how you can upgrade a system running Debian Etch to Debian Lenny. It is intended for both server and desktop systems.

I do not issue any guarantee that this will work for you!

1 Preliminary Note

You should take a backup of your Debian Etch system (you can find some suitable tutorials for this in the Backup category), just in case something goes wrong (but the upgrade worked fine for me).

2 Install The Latest Etch Updates

Before we upgrade to Lenny, we install the latest updates for Etch.

Make sure that your /etc/apt/sources.list uses etch, not stable (because lenny is the new stable), e.g. as follows:

vi /etc/apt/sources.list

deb http://ftp2.de.debian.org/debian/ etch main
deb-src http://ftp2.de.debian.org/debian/ etch main

deb http://security.debian.org/ etch/updates main contrib
deb-src http://security.debian.org/ etch/updates main contrib

Then install the updates as follows:

aptitude update

aptitude upgrade

3 Modify /etc/apt/sources.list To Use Lenny

After we have installed the latest Etch updates, we open /etc/apt/sources.list...

vi /etc/apt/sources.list

... and replace all etch references with lenny:

deb http://ftp2.de.debian.org/debian/ lenny main
deb-src http://ftp2.de.debian.org/debian/ lenny main

deb http://security.debian.org/ lenny/updates main contrib
deb-src http://security.debian.org/ lenny/updates main contrib

Then update the packages database:

aptitude update

4 Doing The Upgrade

Next we install the Lenny versions of dpkg, aptitude, and apt because their Etch versions are often unable to handle the upgrade to Lenny:

aptitude install dpkg aptitude apt

Then we do a minimal system upgrade (because a full upgrade might cause some conflicts at this stage):

aptitude upgrade

---

If this is a desktop system, you should now check if the package libfam0c102 is installed:

dpkg -l libfam0c102 | grep ^ii

If it is, install its Lenny version now:

aptitude install libfam0

---

Afterwards, we can start the full distribution upgrade:

aptitude full-upgrade

(This command is the same as aptitude dist-upgrade.)

Afterwards, reboot the system:

reboot

After the reboot, check your new kernel:

uname -r

It should display Lenny's 2.6.26 kernel, e.g.:

server1:~# uname -r
2.6.26-1-486
server1:~#

And /etc/debian_version should now contain 5.0:

cat /etc/debian_version

server1:~# cat /etc/debian_version
5.0

Done!


How to Install Adobe Flash in Debian Etch/Lenny

Flash Player is a cross-platform browser plug-in that delivers breakthrough Web experiences to over 98% of Internet users.

Method 1

If you run Etch you will want to use backport.org

First you need to edit the /etc/apt/sources.list file using the following command

#nano /etc/apt/sources.list

add the following line

deb http://www.backports.org/debian etch-backports main contrib non-free

save and exit the file.

Update the source list using the following command

#apt-get update

All backports are deactivated by default. If you want to install something from backports run:

#apt-get -t etch-backports install “packagename”

If you are using etch and you want apt to verify the downloaded backports you can import backports.org archive’s key into apt:

#apt-get install debian-backports-keyring

If you want to get your packages from backports upgraded automatically the following entry in /etc/apt/preferences should be sufficient:

Package: *
Pin: release a=etch-backports
Pin-Priority: 200

Once you have backports all set up do one of the following commands

#apt-get update

#apt-get install flashplugin-nonfree

Method 2

Using debian-multimedia.org repo

First you need to download the debian-multimedia-keyring package from here

Install using the following command

#dpkg -i debian-multimedia-keyring_2008.10.16_all.deb

you need to edit the /etc/apt/sources.list file using the following command

#nano /etc/apt/sources.list

add the following lines which is suitable for you

For etch (stable) alpha, amd64, hppa, i386, ia64, powerpc and sparc packages

deb http://www.debian-multimedia.org etch main
or
deb ftp://ftp.debian-multimedia.org etch main
or
deb http://www.debian-multimedia.org stable main or
deb ftp://ftp.debian-multimedia.org stable main

For lenny (testing) alpha, amd64, armel, hppa, i386, ia64, mipsel, powerpc and sparc packages

deb http://www.debian-multimedia.org lenny main
or
deb ftp://ftp.debian-multimedia.org lenny main
or
deb http://www.debian-multimedia.org testing main or
deb ftp://ftp.debian-multimedia.org testing main

For sid (unstable) alpha, amd64, armel, hppa, i386, ia64, mipsel, powerpc and sparc packages.

deb http://www.debian-multimedia.org sid main or
deb ftp://ftp.debian-multimedia.org sid main

For experimental amd64, i386 and powerpc packages. transcode, k9copy and kplayer (Qt4 version) and mjpegtools packages.

The official Debian experimental repository isn’t needed.
deb http://www.debian-multimedia.org experimental main or
deb ftp://ftp.debian-multimedia.org experimental main

For source

deb-src http://www.debian-multimedia.org sid main or
deb-src ftp://ftp.debian-multimedia.org sid main

Install flash player using the following command

#apt-get install flashplayer-mozilla

Once you have flash installed you can check in Iceweasel by entering about:plugins in the address bar. It should show something like:

Shockwave Flash
File name: /usr/lib/flashplayer-mozilla/libflashplayer.so
Shockwave Flash 10.0.12.36

The above works for Iceweasel/Firefox and Opera.

Method 3

If all else fails, download install_flash_player_10_linux.tar.gz from Adobe (http://fpdownload.macromedia.com/get/flashplayer/current/install_flash_player_10_linux.tar.gz) , decompress, cd to resulting directory, then run as root:
./flashplayer-installer

For Iceseasel/Firefox, ell it to install in /usr/lib/iceweasel
For Opera, tell it to install in /usr/lib/opera (and/or where ever else you want).

Works for me.

Installation instructions for tar.gz

  1. Click the download link to begin installation. A dialog box will appear asking you where to save the file.
  2. Save the .tar.gz file to your desktop and wait for the file to download completely.
  3. Unpackage the file. A directory called install_flash_player_10_linux will be created.
  4. In terminal, navigate to this directory and type ./flashplayer-installer to run the installer. Click Enter. The installer will instruct you to shut down your browser(s).
  5. Once the installation is complete, the plug-in will be installed in your Mozilla browser. To verify, launch Mozilla and choose Help > About Plug-ins from the browser menu.

How to install Opera in Debian 5.0 GNU/Linux ("Lenny")

Opera is one of the bests web browsers, and you can download it for your Linux Distro from its website

But if you would like to be able to upgrade your opera using apt with your Debian Lenny you better use repositories.

Debian

You have to edit your /etc/apt/sources.list, and add this line.

For Lenny

deb http://deb.opera.com/opera lenny non-free


Now you need to import the gpg-key.

gpg --keyserver subkeys.pgp.net --recv-key 6A423791
gpg --fingerprint 6A423791
gpg --armor --export 6A423791| apt-key add -

and the update de database

apt-get update

Now you have your source installed and your database updated you can install opera.

sudo apt-get install opera

Howto install video codecs and DVD support in Debian 5.0 ("Lenny")

Note: This is a classic how-to intended for beginners and it describes how to install video codecs and DVD support on Debian Lenny in several easy-to-follow steps.

1. Add debian-multimedia.org repository to your sources.list file
To edit the /etc/apt/sources.list file, type as root:

nano /etc/apt/sources.list

Next, add the following two lines:

deb http://debian-multimedia.org/ lenny main
deb-src http://debian-multimedia.org lenny main

Save the file with ^O (CTRL+O) and close Nano with ^X.

For additional information about the debian-multimedia.org repository, visit the website.

2. Install debian-multimedia-keyring and update the list of packages
As root, type:

wget http://debian-multimedia.org/gpgkey.pub -O - | apt-key add - && apt-get install debian-multimedia-keyring

Then, to update the list of packages type:

apt-get update

3. Install w32codecs and libdvdcss2

apt-get install w32codecs libdvdcss2

That should do it. Next, you will need a video player, and I recommend one of VLC, SMPlayer or Kaffeine.

To install either of those, use:

apt-get install vlc
apt-get install smplayer
apt-get install kaffeine

That's it, you should be done now.