Showing posts with label howto. Show all posts

Sunday, May 10, 2009

How to make OpenOffice load faster


Here we will discuss the procedure to be followed for making OpenOffice run faster in Ubuntu.

Some simple steps make OpenOffice snappier.

  • Go to Applications > Office > OpenOffice.org Word Processor


  • The OpenOffice.org Word Processor is launched. Go to the Tools menu and select Options.

  • The Options window is opened.

  • Highlight Memory on the left panel, change the setting as shown below.


    • Reduce the number of Undo steps to a figure lower than 100. Adelstein suggests 20 or 30 steps.

    • Under Graphics cache, set Use for OpenOffice.org to 128 MB (up from the original 6MB).

    • Set Memory per object to 20MB (up from the default .5MB).

    • Set the number of objects under Cache for inserted objects at 20.

    • Check OpenOffice.org Quickstarter.

  • Now highlight Java on the left panel, uncheck Use a Java runtime environment

  • Click the OK button and close OpenOffice.org. Start it up again to experience the change in speed!

Create a mirror of a website with Wget

GNU's wget command line program for downloading is very popular, and not without reason. While you can use it simply to retrieve a single file from a server, it is much more powerful than that and offers many more features.

One of the more advanced features in wget is the mirror feature. This allows you to create a complete local copy of a website, including any stylesheets, supporting images and other support files. All the (internal) links will be followed and downloaded as well (and their resources), until you have a complete copy of the site on your local machine.

In its most basic form, you use the mirror functionality like so:

$ wget -m http://www.example.com/

There are several issues you might have with this approach, however.

First of all, it's not very useful for local browsing, as the links in the pages themselves still point to the real URLs and not your local downloads. What that means is that, if, say, you downloaded http://www.example.com/, the link on that page to http://www.example.com/page2.html would still point to example.com's server and so would be a right pain if you're trying to browse your local copy of the site while being offline for some reason.

To fix this, you can use the -k option in conjunction with the mirror option:

$ wget -mk http://www.example.com/

Now, that link I talked about earlier will point to the relative page2.html. The same happens with all images, stylesheets and resources, so you should be able to now get an authentic offline browsing experience.

There's one other major issue I haven't covered here yet - bandwidth. Disregarding the bandwidth you'll be using on your connection to pull down a whole site, you're going to be putting some strain on the remote server. You should think about being kind and reduce the load on them (and you) especially if the site is small and bandwidth comes at a premium. Play nice.

One of the ways in which you can do this is to deliberately slow down the download by placing a delay between requests to the server.

$ wget -mk -w 20 http://www.example.com/

This places a delay of 20 seconds between requests. Replace that number, and optionally you can add a suffix of m for minutes, h for hours, and d for ... yes, days, if you want to slow down the mirror even further.

Now if you want to make a backup of something, or download your favourite website for viewing when you're offline, you can do so with wget's mirror feature. To delve even further into this, check out wget's man page (man wget) where there are further options, such as random delays, setting a custom user agent, sending cookies to the site and lots more.

More advanced wget usage:

No parent option

If you are doing a mirror, but you only want to mirror a subdirectory of the main site (for example, just /news/), you might run into a problem. Because many of the pages at /news/ link back to /, you'll inadvertently end up downloading the whole site.

The solution to this, pointed out by Todd in the comments, is to use the no parent option, -np.

In our example, we'd do:

$ wget -mk -w 20 -np http://example.com/news/

Update only changed files

Continuing in our mirroring scenario, another extremely useful option for preserving bandwidth on both sides is to update only the files that the server reports as changed.

This option is -N.

$ wget -mk -w 20 -N http://example.com/

Thanks to Paul William Tenny in the comments for that tip.

Random delay on mirror

And finally for our mirror-specific tips, you can also randomise the delay between downloads. There are several reasons you might want to do this, including sites that don't take kindly to being mirrored, even considerately, and block clients that they suspect of doing it (some bots can be pretty nasty, and you might be categorised as one of 'them').

Randomising the wait time - and combining with the user agent option below - can be steps to circumvent this automatic protection.

If you do find yourself using this feature for that reason, please continue to be considerate and follow any rules regarding the content you've been given. Mirror responsibly.

$ wget -w 20 --random-wait -mk http://example.com/

The wait value - 20 in this case - is used as a base value to calculate what the random wait times will be. They will alternate between 0 and 2 times that value (in this case, 0-40 seconds).

Custom user agent

Some sites might have some strange restrictions on what browsers can access it, or perhaps have different versions of a site depending on the browser used. I can't say I agree with sites that do this, unless there's a really good reason, but it shouldn't stop you from using wget for access.

Using wget, you can set a fake user agent string so that the program reports itself as a different browser.

$ wget -U "user agent" http://example.com/

Combine the -U option with any others you want, obviously. Here are a few user agents you can use to get you started:


IE6 on Windows XP: Mozilla/4.0 (compatible; MSIE 6.0; Microsoft Windows NT 5.1)
Firefox on Windows XP: Mozilla/5.0 (Windows; U; Windows NT 5.1; en-US; rv:1.8.1.14) Gecko/20080404 Firefox/2.0.0.14
Firefox on Ubuntu Gutsy: Mozilla/5.0 (X11; U; Linux i686; en-US; rv:1.8.1.14) Gecko/20080418 Ubuntu/7.10 (gutsy) Firefox/2.0.0.14
Safari on Mac OS X Leopard: Mozilla/5.0 (Macintosh; U; Intel Mac OS X; en) AppleWebKit/523.12.2 (KHTML, like Gecko) Version/3.0.4 Safari/523.12.2

That's it for now, if you have any more useful wget tips and tricks, share them in comments.

Installing Gentoo 2008.0 Live CD


Traditionally, Gentoo Linux has been a distribution designed more towards the more experienced Linux user, perhaps the 'power user', if you will.

Its source-based package management and offering the user complete control over the system installation and configuration have meant that traditionally, it can be difficult to approach.

Having myself tried and failed to install Gentoo in the past, I thought I would take the recently released 2008.0 Live CD for a spin, and see what the installation process is like, and how easy it is to use and understand. So here goes.

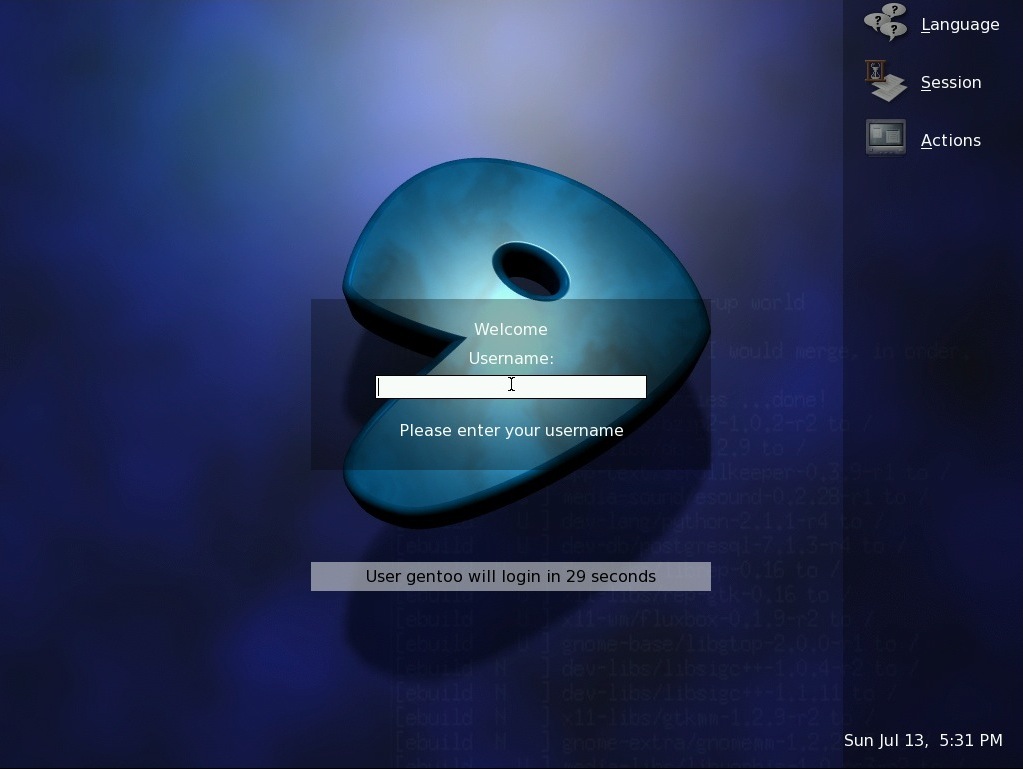
You get started like any other Live CD - throw it in the drive, reboot and press Enter to boot in. Before the GUI even arrives, you'll be asked to pick a keyboard layout to use for the live CD, then eventually you will be greeted with this GDM login screen.
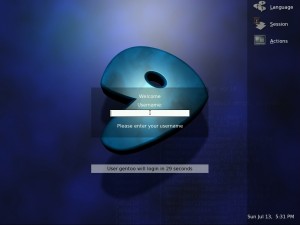
GDM in Gentoo 2008.0

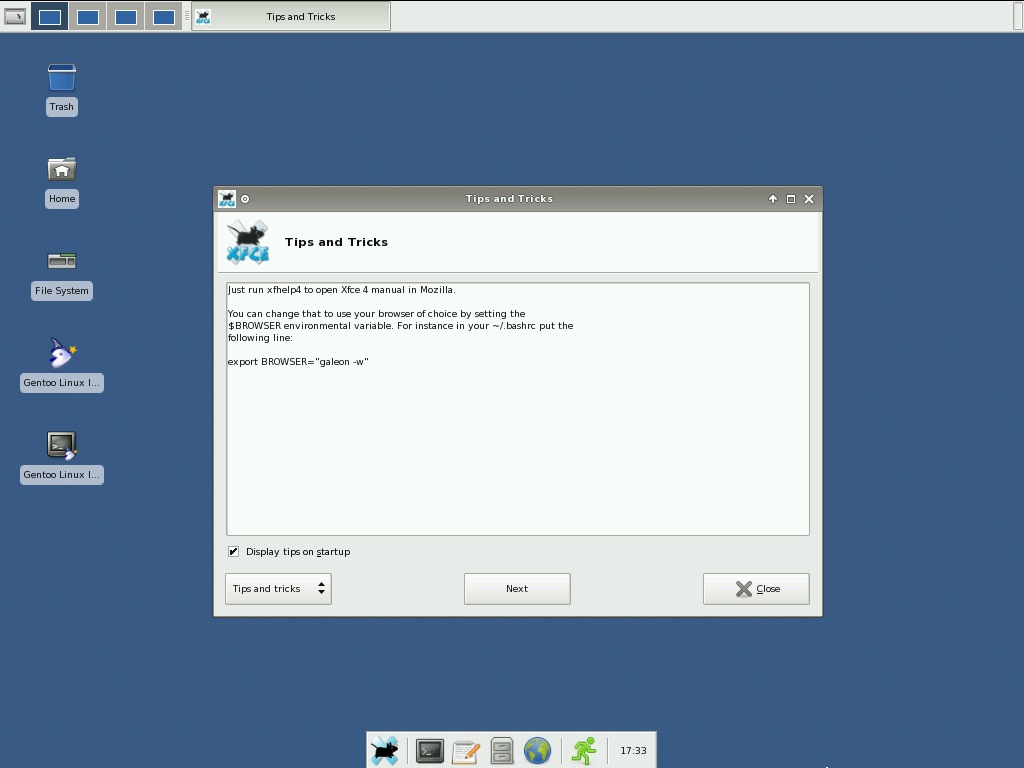
There's an autologin set here, so you just have to wait a few seconds for the live user to be logged in. Gentoo now uses Xfce as the default GUI environment, so it will load up (fast, as it always seems to be).
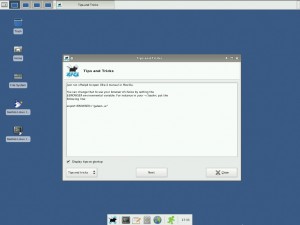
Xfce in Gentoo 2008.0

As expected, this is a fully usable Gentoo system at this point, albeit running Live, so of limited utility. A fair selection of packages are installed, included Firefox 2.0.0.14, in a 'Bon Echo' branded guise.


Still, we're interested in the installation procedure. Conveniently on the desktop is an installer shortcut. Actually there are two - a command-line based installer, and the graphical GTK+ version. I'll be using the latter.

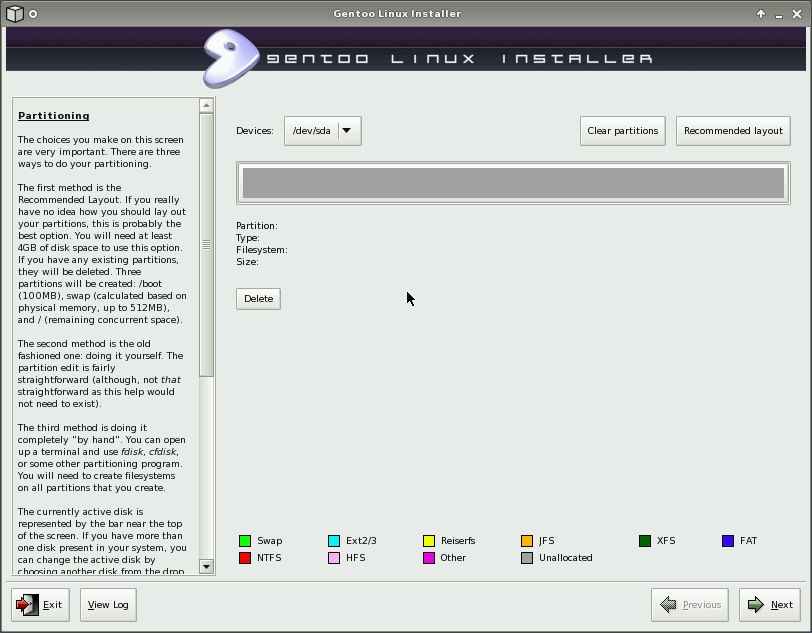
There's no introduction or anything. As soon as you double-click the installer, you're thrown straight in at a partitioning screen. Provided you have a clean disk and don't mind Gentoo monopolising your hard drive, it's simple to click the Recommend Layout button for a one-click solution to this screen.
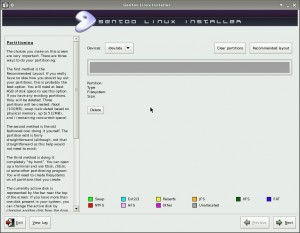
Partitioning in Gentoo Installer

It does, however, give its power user base the ability to fully control how Gentoo will inhabit their hard drives.
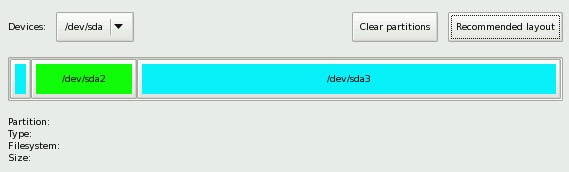
Partition layout

Click Next at this point and you are right away doing mount points for those partitions you just set up (and any others you want too). This is usually saved for the tail end of distro installations, but the way that the Gentoo installer works means that it will mount all of these partitions for you in the live distro too for the install, so it is done at this point.

You don't get an awful lot of confirmation, so pretty much as soon as you hit Next, those partitions will be written to disk and a few files get copied over.
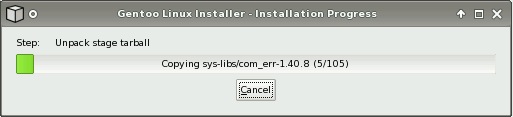
Initial 'stage' File Copy

Once that initial set of files gets copied, you then go back into answering questions. Personally, I don't like this sort of do some work, then ask more questions, then do more work thing.

It reminds me of the Windows XP installation procedure - when you can never just answer questions and set it off doing its own thing, it requires constant supervision. The Gentoo install isn't nearly as bad, but the way it works doesn't feel very 'standard' in comparison to more mainstream Linux distros.

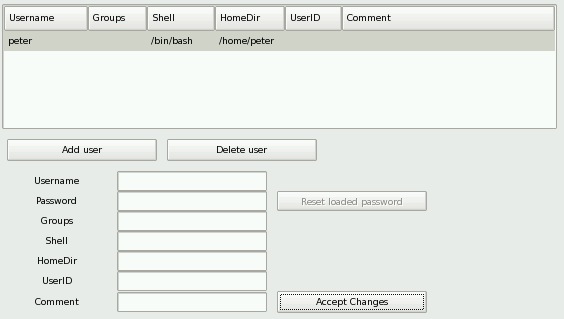
From this point on, you are asked about configuring network interfaces, your root password and setting up the different users for your newly installed system.
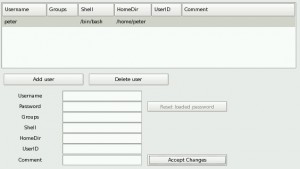
Adding Users

The users module could potentially be a little confusing without a fair bit of Linux experience, as you are asked to manually fill in details such as the user's shell, home directory and user ID. You can leave things blank for defaults, however.

The final step before the proper copying of packages happens is to choose any additional packages you need. If you want a graphical system at the end of the install, you'll need to make sure you check at least the xfce and xorg-x11 packages.

Finally, the proper copy operation gets started. This will probably take considerable time (it did in my VM installation, at least).
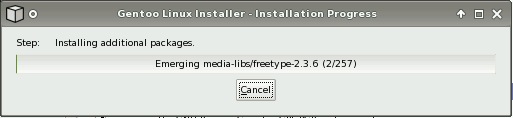
Main installation copying

Once the copy is finished, just as abruptly as it begun, you are notified that the installation is complete and you can reboot into the installed system.

Conclusion

So, how easy is this to install?

It certainly doesn't require much specific knowledge of Gentoo or how it works, but neither is it for the faint hearted.

A significant body of previous Linux experience is expected, as you'll be on your own with respect to key concepts, such as partitioning, packages and users.

I imagine that in a 'safe' environment - i.e. a machine that didn't particularly matter, someone with only intermediate Linux skills could probably get through relatively easily and progress to using the distro.

Gentoo is still very oriented towards the more experienced user and the person who likes to endlessly fiddle with and tweak their system so it works exactly how they like it and has the maximum possible performance.

I don't remember how I fell down on installing in the past, but it certainly seems like an achievable feat for someone with some Linux experience now, and that in itself has lowered the bar to learning and using Gentoo.

They could try to make it even easier to install, but then I guess there might be complaints from those who do not want their installer to be 'simplified' any more.

People like control over their machines.

Cygwin - a Unix Environment and Shell on Windows

If your daily routine means that you spend much of your time behind a Windows system, yet you love the power and flexibility of a Unix-based environment, it might be frustrating not to have access to the tools and environment that you want.

Alternatively, you might want to compile some Linux/Unix software, so that it can run natively under Windows.

Cygwin is a Linux-style environment for Windows, that gives you a set of libraries, a full Linux-style command line and a package manager so you can install many of the Unix programs you might be familiar with.

I thought I would take a look at Cygwin's latest release and show you how to install it and get up and running.

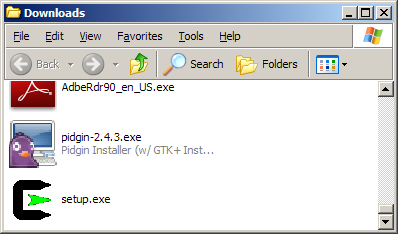
First of all, head on over to the site and download setup.exe. This is the main installer/package manager for Cygwin and by default you use it to do an internet-based install, i.e. the setup program itself will download the packages.

Downloaded setup.exe file

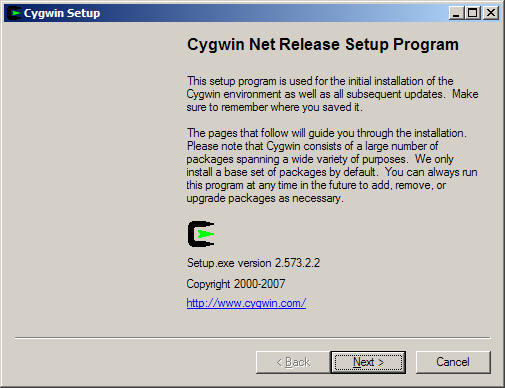
Cygwin Installer

Once the installer is up and running, click Next to bypass the initial welcome screen. You will be given several options on how you want to obtain packages. In most cases, Install from Internet is fine here.

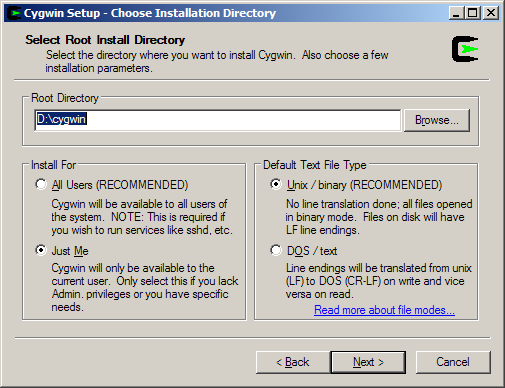
Next, choose the directory to install Cygwin to on your Windows machine. This directory will become your root (/) from within the Cygwin shell.

Choose Cygwin directory

On the next screen, choose the temporary folder where packages will be downloaded before they are installed into Cygwin. If you want, you can use a Windows temporary folder, but if you want to keep the source packages files around so you don't have to redownload later, make it somewhere permanent.

Again, click the old Next button and choose whether you need to use a proxy. In most home computer situations, leave the defaults intact and move on.

The Installer will at this point go off and retrieve a list of the different download sites, or mirrors, available to you. Choose one geographically close to you in preference, but any of them should be fine.

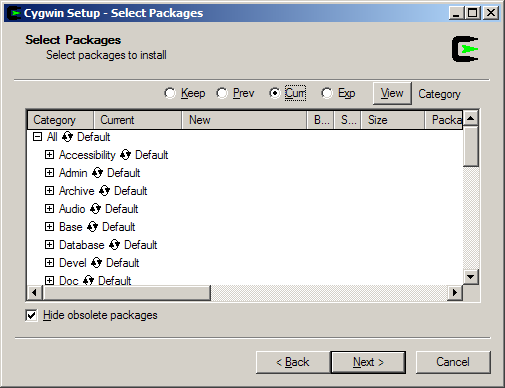
Cygwin Select Packages

Here, you need to choose the packages that you want to install. You can just leave this all as it is and move on, but if you want to install additional packages into Cygwin, follow these steps.

The categories can be either left at the Default setting, or you can choose to Install or Uninstall whole categories by clicking on the 'recycling' icon next to them (and the word 'Default').

For individual packages, expand a category and find the package you want. To install or uninstall it, add a check under the 'Binary' and/or 'Source' columns to grab what you want.

Once you're done choosing packages, click Next yet again to move on. You can always come back to this stage later by re-running the installer to add or remove packages.

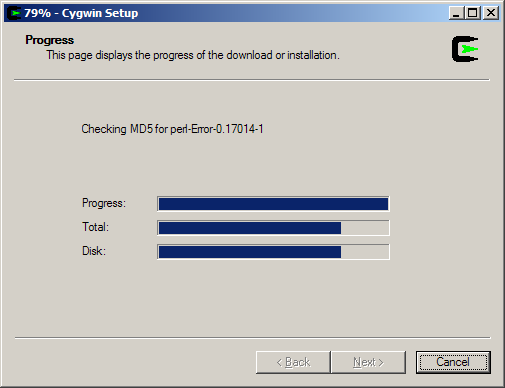
Cygwin Download and Installation

Download and installation now takes place. Depending on the speed of your machine and how much you've asked to download, this could take a while.

Once the installation is finished, pick your Desktop and Start menu shortcut options and Finish.

Finally - that's the installation done! You can access Cygwin through the shortcuts you just made, or by browsing to the directory you installed it in and launching cygwin.bat.

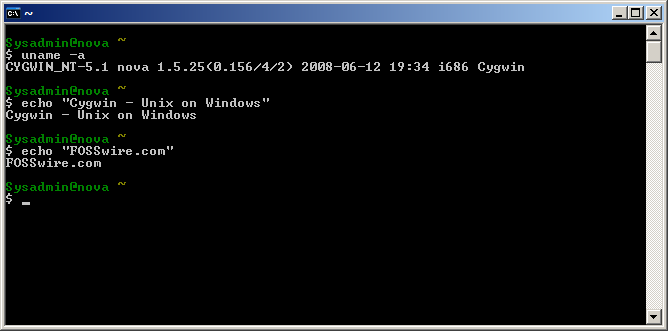
You will be presented with a bash shell, just as on Linux, and all of the Cygwin packages you installed should now be available for use.

Cygwin shell

You can also access Windows programs and files through /cygdrive/[Windows drive letter].

And there you have it - a Linux compatible environment for your Windows machine. Cygwin isn't really for the faint hearted, or those without Linux/Unix CLI experience, but it is a very powerful platform to bringing many features of the Unix platform to a Windows machine in a native way.

You can even run X on it.

Install Ubuntu on your USB Drive


Did you know that is ridiculously simple to install Ubuntu onto an external USB flash drive?

If you have a copy of the latest version of Ubuntu (at the time of writing that is 8.10), there is a very simple program that does it all for you.

You will need:

  • An Ubuntu 8.10 CD (or ISO image if already installed)
  • A USB drive with at least 700-800 MB free space

While you are booted into Ubuntu, go to System > Administration > Create a USB startup disk.

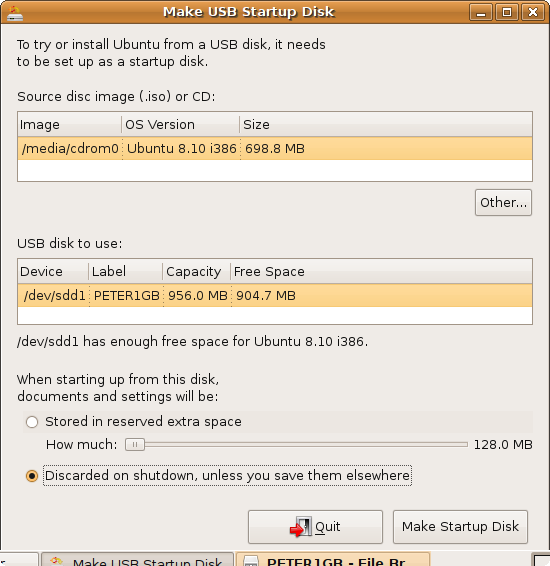
Make Bootable Ubuntu USB Drive

You'll need to choose the source disc image for Ubuntu. If you have your Ubuntu CD in the drive, this should appear in the list, so make sure it is selected. Alternatively, you can click 'Other' and specify where the .iso image of the Ubuntu CD is.

Next, plug in your drive and choose it as your destination drive (and double-check it's the right drive before going ahead).

You can also choose how much space will be reserved for saving data on the new drive, or turn data storage off (it will act just like the Ubuntu live CD).

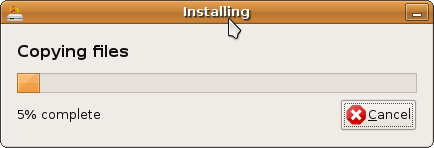
That's it! Simply press Make Startup Disk and wait while the files are copied over.

Installing Ubuntu on USB Disk

On many modern PCs that are configured to allow USB boot, you should be able to just restart the machine with the USB drive plugged in and Ubuntu should boot straight from it!

It's a nice simple way to have a copy of Ubuntu in your pocket, wherever you go.

Installing Ubuntu 8.10 on a White MacBook

Ubuntu logo

Installing Ubuntu (or any other Linux) on a Macintosh is a slightly different process than installing Ubuntu on a more traditional PC. Various differences in the hardware, particularly the use of the EFI firmware system, mean that some extra effort is required to get your favourite distro up and running on your favourite hardware.

This tutorial is inspired and somewhat derived from the Ubuntu Mactel Community Documentation, as well as my own experience of this process.

So let’s take a look at the steps involved, before we dive in.

Overview

We can divide the installation process into these major steps:

  1. Make free space
  2. Install rEFIt boot loader
  3. Run Ubuntu installer (setting GRUB boot loader location)
  4. Sync MBR with rEFIt
  5. Boot the system and uninstall rEFIt

I will be installing Ubuntu 8.10 on a late 2006 white MacBook, so this guide may be somewhat specific to the white MacBook, but should be fairly similar on most Intel Macs.

Why?

Because the MacBook is a really nice piece of hardware. Many bits and pieces of the MacBook hardware work out of the box, including:

  • Graphics
    • Intel GMA 950 and Intel GMA X1300 integrated graphics have open source drivers, so everything ‘just works’ out of the box, including desktop effects.
    • The newer NVIDIA 9400M-based MacBooks will require the installation of the NVIDIA proprietary driver for full graphics support.
  • WiFi
    • Support for the WiFi chip used in the MacBook is built right into recent revisions of the Linux kernel. The result? WiFi ‘just works’. Seriously.
  • Bluetooth
  • Audio
    • After a little fiddle with the audio volume levels.

Backup, Backup, Backup

Before you do anything, make a full backup of your system. Anything you care about must be kept somewhere else as well, just in case this process goes wrong. A Time Machine backup should be fine, as long as you don’t forget to also backup the exceptions to your Time Machine backup separately if you don’t want to lose them.

Once you are completely confident that you could restore the entire system in a snap, or are convinced that you don’t care about anything on the machine, go ahead and continue with this tutorial.

Make Free Space

The first step is to make enough free space on your disk for Ubuntu to exist within. There are essentially two ways to achieve this. Unless you’re reinstalling Mac OS X from scratch anyway, it is probably a better idea to use the Boot Camp method, as you don’t have to delete everything to do so.

Using Boot Camp Assistant

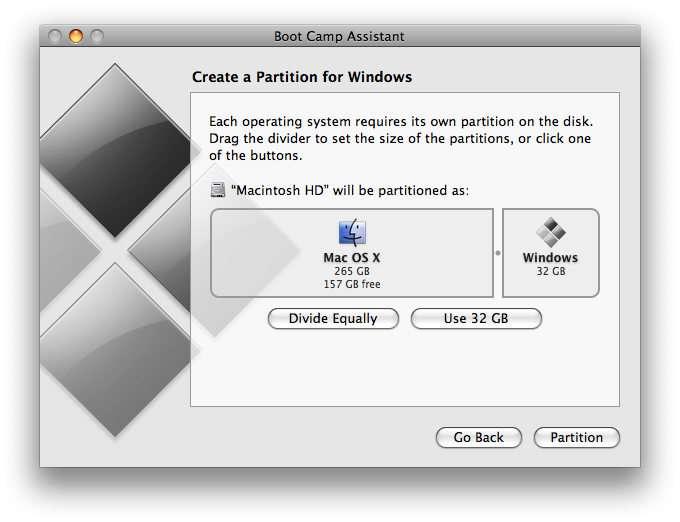
Screenshot of Boot Camp Assistant

Despite being designed for dual booting Windows and Mac OS X, Boot Camp Assistant is very useful to us as it automatically repartitions the hard drive on the fly, without deleting any of your data.

The space that you allocate to ‘Windows’ in this screen will, obviously, be the space that Ubuntu will occupy, so give yourself as much space as you think you will need.

Once you’ve clicked Partition, simply choose Quit and Install Later, as we won’t actually be installing Windows.

Now Boot Camp Assistant very helpfully formatted the partition as FAT32. Um, great, but we actually want free space. We’ll fix this from the Ubuntu side later.

By Reinstalling

If you happen to be reinstalling OS X anyway, you can use Disk Utility from within the Mac OS X Installer (in the Utilities menu) to partition the disk, manually creating a Mac OS Extended partition for OS X and deliberately leaving some space as unformatted.

Install rEFIt Boot Loader

In order to fix the system’s Master Boot Record (MBR) after the Ubuntu install is complete, we need to briefly install rEFIt, a custom bootloader for EFI-based computers, including Intel Macs.

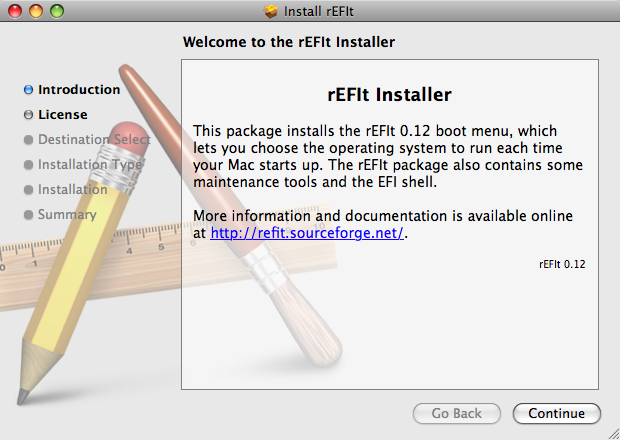
Go ahead and download the Mac disk image and run the installer package.

rEFIt Installer

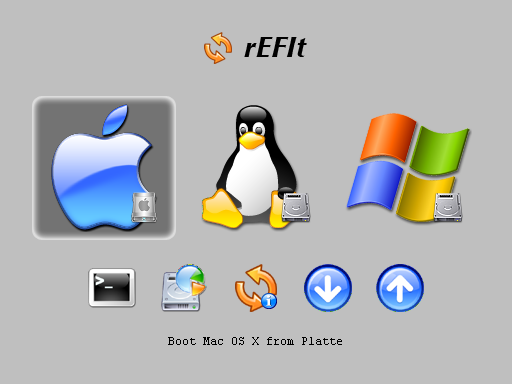
Once it is complete, reboot the Mac and verify that you get a screen that looks something like the following (it won’t have a Tux icon yet and shouldn’t have a Windows icon either).

rEFIt boot screen

OK, we’re finally ready to kick off the Ubuntu install.

Run Ubuntu Installer

For the most part, this process is exactly the same as you would do on a PC. There are, however, two crucial steps you must get right.

Before getting started on the install, however, we need to get rid of the FAT32 formatting of the Boot Camp partition. Pop the Ubuntu CD into your computer and reboot. At the rEFIt boot menu, you can choose to boot Linux from CD. I recommend you plug in a USB mouse at this point so you can right-click.

Select Try Ubuntu without any change to your computer to get into the full Ubuntu interface. Once the system boots, go to Applications > Accessories > Terminal.

$ sudo gparted

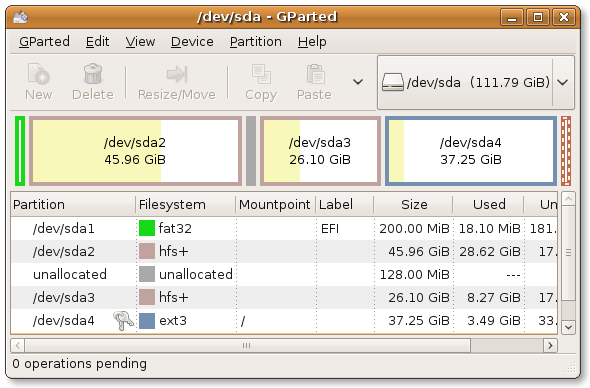
This opens the partition editor, so we can go ahead and wipe that partition.

Partition editor screenshot

You’ll want to find the FAT32 partition labelled ‘Boot Camp’ (NOT the one labelled ‘EFI’ at the start), right-click it and choose Delete. Apply the changes.

Once the changes are applied, you can continue with the installation, as normal, except the following two things which must be set correctly:

Choose ‘Largest Continuous Free Space’

When you are asked by the installer how you want to partition the disk, choose Guided – use largest continuous free space. Since you just made sure you have a large chunk of free space earlier, by deleting the Boot Camp FAT32 partition, it will recognise that and use the space for Ubuntu.

If you are desperate to partition it yourself and know what you are doing, just make sure the bootable partition is the first one. Don't put your swap before your data on the disk, or the Mac will try to boot from the swap partition.

Install GRUB on sda

At the final page of the installer, ‘Ready to install’, where you are shown all the settings for the install, make sure you click the Advanced button and choose to install GRUB onto /dev/sda3.

Sync MBR with rEFIt

So, the installation should finish and you will be told to reboot. When the system comes back up, do not jump straight away into the new Linux option on your rEFIt boot menu.

rEFIt boot screen

Instead, select the Partition Tool icon. It should tell you that the Master Boot Record need to be synced and offer to do so. Press the Y key to accept this and you will return to the boot screen.

I recommend at this point you select the option to shut down your Mac, give it a few seconds to clear everything out and then turn it back on. This avoids a lockup I experienced right after you perform the MBR sync.

Boot the System and Uninstall rEFIt

At this point, you should be ready to go. At the rEFIt boot menu, choose the Linux option and Ubuntu should boot. At this point, everything should be just the same as it would be on a PC.

You can now uninstall rEFIt if you desire, or you can leave it intact and use it each time the system boots to choose your operating system. The choice is entirely up to you.

If you remove it, you can boot into Ubuntu with the Mac’s native boot loader by holding down the Option key at startup and choosing the disk entitled ‘Windows’.

Conclusion

And that’s it. After you’ve done this little bit of fiddling to get it installed, and perhaps once you have configured some components that don’t work out of the box, you have a very nice little Ubuntu machine.

Tuesday, May 5, 2009

Tricks To Increase Your Firefox Speed By A Noticeable Amount


Hello. With this simple detailed tutorial I will show you how to increase the speed of Firefox by 10-30 times.hah

Firefox is a well known open source browser and is widely used around the world for it being secure, stable and fast.

But by default few settings are disabled in this which makes it bit slow sometimes. With this tutorial you will be able to explore the hidden speed of Firefox which will boost the speed of Firefox and make your Firefox lightning fast. kenyit

Download the latest version of Firefox from here. Now install the Firefox.

To speed up Firefox follow these steps.
For those who are unsure about the changes, please first refer to this post:
Backup Firefox Profile And Restore It!


01. Type about:config in the address bar and then press Enter.
steps in speeding up firefox

And you will see a confirmation message like this:
steps in speeding up firefox

Now click I'll be careful, I promise!

02. You will see a label there Filter, just next to it type network.http.pipelining. Now be sure the value field is set true, if not double-click to set true.
steps in speeding up firefox
Info: HTTP is the application-layer protocol that most web pages are transferred with. In HTTP 1.1, multiple requests can be sent before any responses are received. This is known as pipelining. Pipelining reduces page loading times, but not all servers support it!

03. Go back to the Filter search bar and type network.http.pipelining.maxrequests. Double-click this option and set its value to 8.
steps in speeding up firefox

04. In the Filter search bar and type network.http.proxy.pipelining. Once opened double-click on it and set it to true.
steps in speeding up firefox

05. Type network.dns.disableIPv6 in the filter search bar and set this option to true by double clicking on it.
steps in speeding up firefox
Info: In IPv6-capable DNS servers, an IPv4 address may be returned when an IPv6 address is requested. It is possible for Mozilla to recover from this misinformation, but a significant delay is introduced.

06. CONTENT INTERRUPT PARSING
This preference controls if the application will interrupt parsing a page to respond to UI events. It does not exist by default.
Right-click (Apple users ctrl+click) anywhere in the about:config window, select New and then Boolean from the pop-up menu. Then:
steps in speeding up firefox

A. Enter content.interrupt.parsing in the New boolean value pop-up window and click OK.
steps in speeding up firefox

B. When prompted to choose the value for the new boolean, select true and click OK.
steps in speeding up firefox


07. Rather than wait until a page has completely downloaded to display it to the user, Mozilla applications will regularly render what has been received to that point. This option controls the maximum amount of time the application will be unresponsive while rendering pages.

Right-click (Apple users ctrl+click) anywhere in the about:config window, select New and then Integer from the pop-up menu.
steps in speeding firefox

A. Enter content.max.tokenizing.time in the New integer value pop-up window and click OK.
steps in speeding up firefox

B. You will be prompted to enter a value. Enter 2250000 and click OK.
steps in speeding up firefox


08. CONTENT NOTIFY INTERVAL
This option sets the minimum amount of time to wait between reflows. Right-click (Apple users ctrl+click) anywhere in the about:config window, select New and then Integer from the pop-up menu.
steps in speeding firefox

A. Type content.notify.interval in the New integer value pop-up window and click OK.
steps in speeding up firefox

B. You will be prompted to enter a value. Enter 750000 and click OK.
steps in speeding up firefox


09. CONTENT NOTIFY ONTIMER

A. This option sets if to reflow pages at an interval any higher than that specified by content.notify.interval. Right-click (Apple users ctrl+click) anywhere in the about:config window and select New and then Boolean from the pop-up menu.
steps in speeding up firefox

B. Type content.notify.ontimer in the New boolean value pop-up window and click OK.
steps in speeding up firefox


C. You will be prompted to choose the value for the new boolean. Select true and click OK.
steps in speeding up firefox


10. Notify Backoffcount
This option controls the maximum number of times the content will do timer-based reflows. After this number has been reached, the page will only reflow once it is finished downloading. Right-click (Apple users ctrl+click) anywhere in the about:config window and select New and then Integer from the pop-up menu.
steps in speeding firefox

A. Enter content.notify.backoffcount in the New integer value pop-up window and click OK.
steps in speeding up firefox

B. You will be prompted to enter a value. Enter 5 and click OK.
steps in speeding up firefox


11. CONTENT SWITCH THRESHOLD
You can interact with a loading page when content.interrupt.parsing is set to true. When a page is loading, the application has two modes: a high frequency interrupt mode and a low frequency interrupt mode. The first one interrupts the parser more frequently to allow for greater UI responsiveness during page load.

The low frequency interrupt mode interrupts the parser less frequently to allow for quicker page load. The application enters high frequency interrupt mode when you move the mouse or type on the keyboard and switch back to low frequency mode when you had no activity for a certain amount of time. This preference controls that amount of time. Right-click (Apple users ctrl+click) anywhere in the about:config window and select New and then Integer from the pop-up menu.
steps in speeding firefox

A. Enter content.switch.threshold in the New integer value pop-up window and click OK.
steps in speeding up firefox

B. You will be prompted to enter a value. Enter 750000 and click OK.
steps in speeding up firefox


12. NGLAYOUT INITIALPAINT DELAY
Mozilla applications render web pages incrementally, they display what??™s been received of a page before the entire page has been downloaded. Since the start of a web page normally doesn't have much useful information to display, Mozilla applications will wait a short interval before first rendering a page. This preference controls that interval. Right-click (Apple users ctrl+click) anywhere in the about:config window and select New and then Integer from the pop-up menu.
steps in speeding firefox

A. Enter nglayout.initialpaint.delay in the New integer value pop-up window and click OK.
steps in speeding up firefox

B. You will be prompted to enter a value. Enter 0 and click OK.
steps in speeding up firefox


That's it! Now restart Firefox and your browsing as well as downloading speed will be much more faster. Good luck.peace